Monday, 28 December 2020
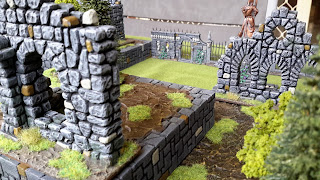
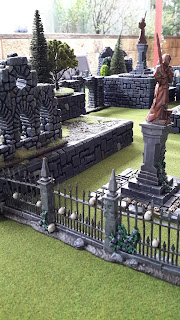
A very grave project indeed ...
Friday, 18 September 2020
A new Saga begins ...
It all started when I picked up Beowulf for a more thorough read some weeks ago. I have read it several times but this time I was serious - I was taking notes.
From there it led me to the Sagathing podcast - which I heartily enjoy.
Then, while discussing what to play, a friend suggested a Dark Age wargame as he had been enjoying Crusader Kings III.
Last Tuesday saw a return to Saga - 1st edition - as I don't own the latest copy. I wasn't clear about Saga until 20 mins before the game. Dux Bellorum was also a strong possible rule system for the game. But I chose Saga. I had a skirmish type game in my mind.
Here was the concept ... years before the Great Heathen army invaded England's pleasant shores, Earldorman Athelwulf and Jarl Healfdene had sparred off as young adventurous warriors in a number of struggles. Each trying to raise his status, wealth and attract other warriors to their bands. This would be played out in Saga.
The first scenario was taken directly from the 'Hord and the Holme Dwellers' saga.
Both Athelwulf (Anglo-Saxon) and Healfdene (Viking) set their eyes upon the barrow of Soti the Beserker for within lay his famed sword and expensive armring. With these items, either man would appear more illustrious. For Athelwulf, a Christian, he could melt down the items and use the silver to pay off a weregild he gained last summer (he had stolen a horse and had not yet paid off the owner.) Note: I had moved the barrow of Soti from Iceland to England - in particular the lands the Midlands or what would become known as the Five Boroughs after the invasion and subsequent settlement in 865AD.
In the first scenario (Sacred Ground), Athelwulf triumphed and took both sword and armring. Healfdene was wounded but fled the battlefield vowing to return for the wealth of Soti. Athelwulf packed his wounded men and the items into a wagon and left for his lands. To aid new players, I modified Saga to only use part of the battle-board and played with just two units and a warlord per side.
Next, Healfdene attacked the wagons (Convoy) trying to wrest control of the sword and armring back from Athelwulf. I increased the warbands by a single point - both players now had three units - but these were warriors (as yet no huscarl would follow such a junior adventurer.) Again, Athelwulf triumphed and Healfdene was struck down. The Anglo-Saxon's pride now swelled after two victories and he decided he would be strong enough to ignore the weregild hanging over him. He kept the sword and armring for himself. Healfdene was left, wounded again but alive, beneath a pile of bodies. On his return, his miraculous survivals enhanced his reputation as did his tales of Viking loot pillaged by Saxons. He drew men to his cause and he would return to fight Athelwulf again.
For the Saxon, a Viking slave recognised the armring and spake prophetic words:
Strong blade, breaker of shields,
Victory has called and wealth taken,
But sly and lurking amid the song,
Lays doom growing undiminished.
(The slave knew that Soti had laid a curse on any who took his armring from the barrow.)
But the bold hero, Athelwulf, was heedless to these words as he held strong to his Christian faith. After his warriors had healed, he would take the fight to a nearby Viking homestead which held a Saxon monk - Osric - captive. His recovery would bring a chest of silver as reward from his brother - the Earl Odda. Perhaps, it would even gain Athelwulf a seat at this powerful Earl's meadbench?
If Healfdene could defeat Athelwulf, he might be seen as a defender of the new settlers and attract more men to his cause. He could even take the monk for himself? Would not the Earl pay him too for the recovery of the monk, Osric? But how would he pass through Saxon lands without consequences?
A showdown with Athelwulf might be necessary to wound his foe and gain the breathing space he needed. But if he failed ... he may be forced to slaughter Osric to try and regain the favour of the Old Gods. Such an act would surely bring a Saxon response and undoubted retribution.
Saturday, 29 August 2020
Spring, Napoleonics and a Slippery Dip
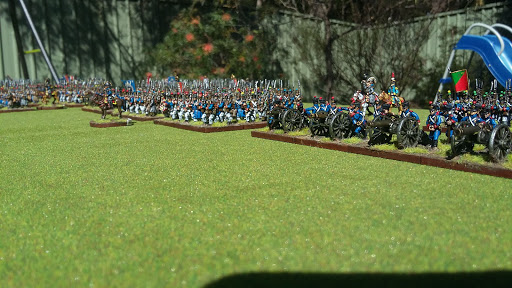
Winter's grip is lifting, the sun is shining and my Napoleonic project is so close to ending. I am painting only skirmishers and a final Prussian battery. While my wife and daughter were away I set up my completed units. 31 infantry, 8 cavalry and 10 batteries + command.
I have also been grumbling about the quality of some of my in-game photography at night so I resolved to make use of the light. I carried one table into the back yard and set this up. Unfortunately it was too breezey to put any terrain on the table. I resultant spectacle of Napoleonic mass is - for me - quite impressive.
Above shows the Brandenberg uhlans supporting brigades of line, reserve and landwehr regiments.
My French are regiments with line and light uniform but also greatcoat. This represents those many thousands hurried into the ranks in 1813 and 1814. Many units mix line or light and greatcoat figures. I mass the normal uniform to the front of such units.
Looking across the French line ... a brigade commander rides forward to inspire the men.
Some men even sport a dark blue greatcoat pilfered from the stores of the guard.
The bulk of the Prussian line. I find the landwehr just glow with their blue and yellow. The line do not appear as bright due to the large amounts of black - not just shakos but also the leather and dark blanket rolls.
Looming behind is the prize of the battle ... Napoleon's slippery dip!
Opposing the Prussian cavalry a heavy brigade ... 2 cuirassier and 1 dragoon. The Emperor's mailed fist.
Lacoste awaits the Emperor's command to lead forward a brigade of Young Guard. (I do want to change the fanion on the right ...)
All up ... I'm pretty happy - photos turned out well. A nice afternoon!
Tuesday, 11 August 2020
Blucher Late War Battle
This week's battle was another 'Blucher' game. This is my rules of choice right now. My enthusiasm stems from the near completion of my second Napoleonic army - Prussia. All miniatures on the table - as well as terrain - are mine. It gave quite a sense of pleasure to sit back and watch. I must admit that it rather distracted me from the game. Well, thats my excuse for such poor play. I don't think I've managed to develop effective tactics for my Late War Prussians as yet.
Below an image of my French battalions (brigades in Blucher terms) surging forward. Most were run as Marie Louise conscripts - who are very good in these rules with the skirmish and shock traits.
The lower cost of the French conscript infantry allows more batteries. The French list I designed runs with six. These were to have a terrible cost for the Prussian brigades struggling forward last night.
Ah ... the Prussian infantry trying to advance. Low MO rolls throughout the evening would leave these fine troops stranded before the French cannon - that and my bad deployment and management of available movement did not help. I ended up trying to attack over too wide a frontage against superior troops. An in depth assault may have been better.
My Prussian cavalry division. This was pitifully utilised on the evening never really playing a role and being committed too early allowing the French player to flank with his cavalry. I'd hate that move ... if it wasn't the very one I've used so many times previously.
A close up of French guns slamming roundshot then cannister into the headlong assault of the Prussians. The general who ordered this will swing!
Above a French division is halted by the appearance of Prussian dragoons and hussars. From this point the confusion of battle would befuddle the Prussians allowing the French time to form square.
The Prussians try to form up to drive home an attack ... but already one brigade down due to murderous French artillery fire. The landwehr cavalry would charge repeatedly at the French square at the end of the line to little effect.
A strong mixed French line ferociously guards the objective. The superior artillery fire allowed the French to sit unmoving and pepper the Prussian line. This allowed movement points to be spent elsewhere whilst the wide Prussian assault demanded movement points everywhere - and they were critically short throughout the battle. No one attack was really driven home.
My new Brandenberg Uhlans ... I had even forgotten to varnish ... they too were left languishing under cannon fire (see the top left of the image) while movement points were either none existent or squandered.
Ah ... to flash or not to flash ... a dimly light garage and not the best phone. Perhaps a photo opportunity lost. Overall, a fun game which would normally have been very frustrating for me. However, on this occasion, I was more interested in the spectacle provided and the final materialization of my desire to play the great and desperate battles of 1813. I found it a different and quite satisfying experience. As my troops - and all 26 infantry, 8 cavalry and 10 batteries + command were mine - won and lost the evening I couldn't really be too upset.
May this long continue ... (except the criminal deployment and flawed command decisions.)


