Both games were enjoyable and fun was had by all ... but what happened?
Ian (Confederate) and I (Union) renewed our feud once more. On the other table Nic had supplied everything - including a lovely space gaming mat - and was Admiral Akbar to Jason and Micko's Grand Moff-Tarken (I have no real idea how to spell that.)


Sharpe's work very well for ACW. As in previous posts we use a stand of figures to represent a figure. We consider each unit a regiment and the rules respond kindly. I always supply the Union with an additional command but the Reb's have superior troop quality and therefore higher morale. Given the card based activations, it is very hard to bring a numerical superiority to bear as usually parts of each force seem to receive cards irregularly at best.


The cards do represent the ebb and flow of battle initiative quite well as each side seems to enjoy periods of every game where a run of activations allow a side temporary dominance only to fall into lethargy later. Perhaps their energy is temporarily spent (I do note though that gamers imaginatively like to create explanations to justify any rule aberration or nuance to keep their favoured rule system being played ... Am I doing this here? I'm not sure I'd know even if I was.)
Back to the game ... The Union were aggressive this evening and pushed forward with all commands quickly. The dice decided to limit this advance and replicate some prevarication of less than competent commanders in the Union ranks - trans. I rolled low for movement throughout the night.
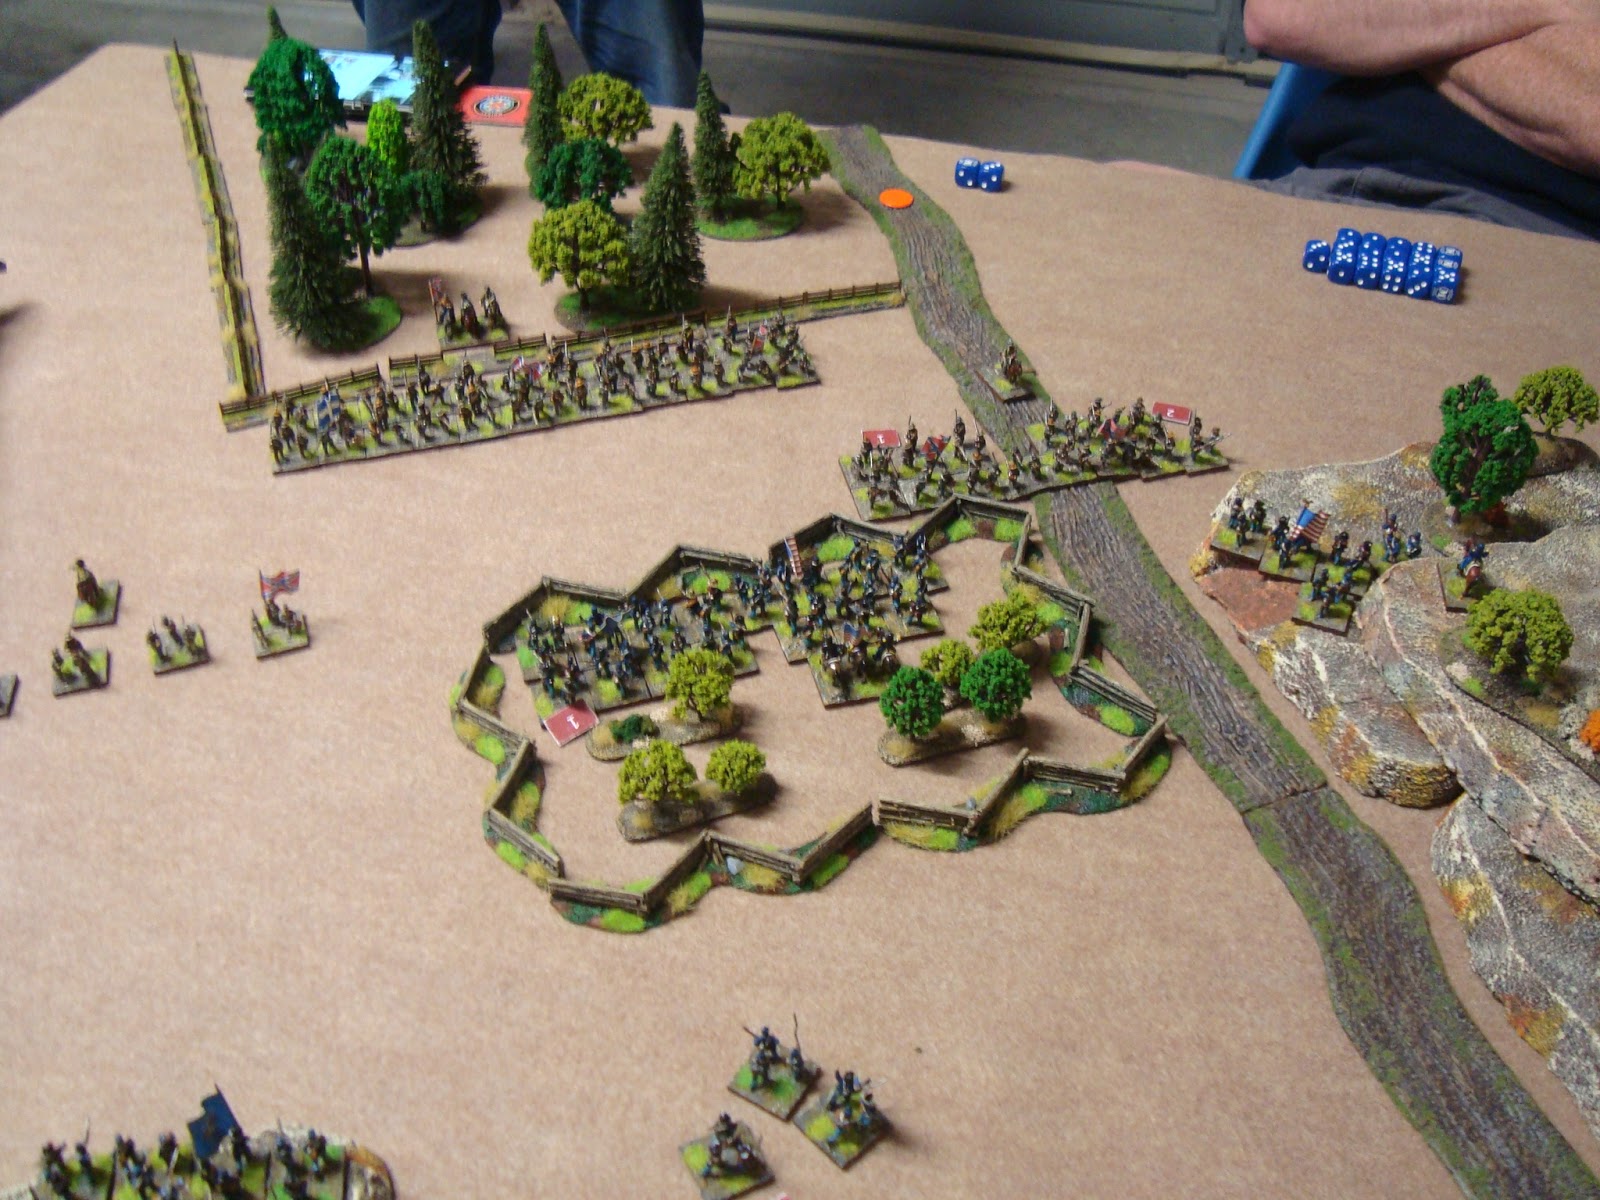
The Southerners pushed forward with their skirmishing troops infesting Old Scroggin's Orchard and Turkey's Knob - a central high point on the battlefield.

Before too long, the main brigades of both sides deployed and struggled free of woods and fence lines to take better positions. The Union established a strong line along the snake rail fence which was built beside the main Lushville Lane.


However, the Union commander - confident in his numerical and moral superiority - ordered his men forward to gasps of amazement from the Rebel General Blackcat. The Union skirmishers threw caution to the wind and charged the Reb's in Old Scroggin's orchard driving them from their position and taking it for themselves. From here successive card activitations fell for the Rebs who poured fire on the Union skirmishers and they played no other role that evening.


By this time the Union battle main battle line had advanced and was eager to take the orchard and make it into a fortress. If only their flanking forces could advance their position would be safe and the rebels would have to chance risky tactics to dislodge them.

The Union right failed completely to support the centre. One Union regiment was ordered to charge and drive the Reb skirmishers from the brush on Turkey Knob. Poor movement saw them repeatedly raked by volleys which led to an accumulation of shock. This resulted in removal of combat dice and the Union were sent packing.

Meanwhile ... space things happened.

I have no real idea what happened.
But doesn't it look nice.

Then the cards displayed a fatal shift of initiative against the Union.

Once in position they lost their nerve - perhaps disordered by terrain or were the Confederate troops energized by this threat? Volley after of volley crashed out from the Rebel line disordering, injuring and killing the brave northern men.


Shock and casualties grew but - as often happens in the Sharpe's Practice games - it did not effect the moral of the Union in any way. Sure their combat effectiveness was severely curtailed but it did not bring the South any closer to victory.
(An afterthought here is what would have happened if the Confederate's had risked a charge? Probably victory - with some "acceptable" losses but they are lead after all - and this would have resulted in multiple morale loss rolls for the Union. This may be how it is supposed to be played?)
For the Reb's their moral had been slowly falling throughout the evening as they lost several combats, leaders and a unit here and there. BUT ... again a quirk of Sharpe's is that if you roll low for morale loss your force will succumb VERY slowly indeed.
It always reminds me of "The Death of the Thousand Cuts" when I play Sharpe's. The morale system needs a tweak.

So at the end the Union morale was still high but the South was down to just 4 of a once proud 11. Yes, the Union were just about to lose quite a few - if they didn't retire - but probably not quite that many. One attempt at retreat by the North led to a total of zero movement as low dice, terrain and shock combined against this order. There would definitely be more blood before the soldiers would reach safety. Who knows ... high rolls here could see the Union morale tumble - but they still had 10 of their initial 11.
Due to the advance of the north, the rebs had the whole table to march before reaching their objective - Syd James' Crossing - and the North still had three strong units and a working battery to pepper the rebs as they came.
Both sides agreed on an amicable draw as it was late and neither side could move from its strong point without ensured destruction. As the sun went down the cries of the wounded could be heard echoing from Old Scroggin's Orchard but each force knew it had done its derndest and were not ashamed for their efforts, bravery or the cause for which they fought.
The commanders knew that wargames was the winner once more.