Tuesday 19 December 2017

Congo Wargame


This was the first game of Congo where I used the correct table size. This was kindly pointed out to me by someone who viewed one of my blog battle reports. I repeated the Nziari scenario that I have recently written a report on but with a reduced table and river size. I only have two rivers - one 2" wide and the other about 7" wide. Neither of these seemed to fit so I decided to use the smaller of the two. No, I'm not making or buying ANOTHER river. 


Above is the Banks expedition. One change I made was to make both commanders 'Retired Officers' as this seems to be much more useful than the other suggested in the scenario. I chose 90 point armies for this game with lots of native troops such as the Young Warriors and Askari shown above. Both sides also make use of porters and scouts. 


The entire length of the Nziari from the other angle. The three flag markers are shown down the river. In this scenario these flags must be secured and then taken off the opposite side of the table - through or around enemy lines. 


The adventurer unit complete with Dr Smuts - the expedition leader - and a porter. Quite a tough unit. 


These scouts are led by Tarzan himself - for some reason they have a porter - god only knows what he is carrying for Tarzan - a man who only owns a knife and two loincloths. 


Here askari and trained askari advance but one is effected by a movement stress token. A sudden downpour in Turn 2 reduced the range of missile for a turn. 


At the end of this turn the Smut's expedition had drawn the better cards through Confusion and were able to race toward the river. They also had more units on the right flank that were unopposed by the Banks expedition. This would lead to a swift capturing of the flag in this area. 


The Banks expedition were slow to start but tried to use psychological warfare on their enemy. 


What impressive cards! With this bonus card 6 units could move - these cards enabled the Banks party to surge forward. A shame however - an unhappy chance indeed - that Smuts had chosen and drawn the exact same card combo. 


Things were getting close and personal. Volleys of fire were exchanged across the river while crocs waited for the unwary. The men from Smuts plunged into the river seizing the central flag too. 


As described above. 


Some of the final bloodshed. The Banks expedition relied on fire to try and decimate their foes. This was less than successful mainly due to some amazing cover rolls from their opponent. Smuts however relied on movement to grab the flags and run. Although things were pretty hairy and tight at times - his men were able to thread the needle and run through tiny gaps using bonus cards to extend their movement and they were able to secure two flags from the table. At this point we decided to conclude the game not only due to victory points but also because it had been rather hot that day - over 40 degrees C all day and still by about 10pm that night. Congo like temps for a game of Congo. Thank god that the mosquitoes - although present - were not in similar numbers. 

Lion Rampant


The Baltic regions were aflame with battle once more. The Brotherhood of the Sword had deployed to engage in a "Bloodbath" scenario to revenge their loss of a key storage building in the last game. on the other side the Forest worshipers of the Giant Forest Rabbit were flushed with their victory and sure they could take on the Crusaders in more open ground. They would later rue this decision. 


Above the entire battlefield stretches before you. The Baltic Pagans chose a strong deployment on their right. Only a single unit anchored the other flank. For the Crusaders they stood back relying on the aggressive advance of their enemy. They decided to use their missiles to thin the enemy numbers and a right hook of cavalry to attack the flank. 


Here the Pagans can be seen lurking in the forest hoping to catch a glance of their beloved rabbit god - also no doubt throwing some insults. 


The Crusaders were made of stern stuff however and they ignored the nasty names they were called and stayed in their formation. This consisted of two spear units guarding a crossbow unit. This formation is very effective as units cannot come within 3" of the enemy in Lion Rampant - the enemy cannot attack the crossbow without routing the spear first BUT the crossbow can still shoot. 


Part one of the cavalry armoured fist that rode around the side of the pagans. 


Part two - these mounted men-at-arms pack a terrific punch and in this game their entry into the fray in the final turns was key to securing victory. 


A back view of the main Crusader formation. 


The main assault of the Pagans - I do like the pretty red shields. Unfortunately too many were perforated by missiles and their Rabbit god deserted them at key moments. Many of their courage rolls throughout the night were very low leading to Battered results and routs that left their line very thin. 


Not the last act for the evening but this image is telling of the final phase. The Crusader cavalry crashed into the enemy - although flanking has no effect in Lion Rampant - inflicting many casualties on the lines thinned by crossbow bolts and bidower fire. The shakiness of the image was caused by the thundering hooves and their effect on the photographer. 

Friday 8 December 2017

Lion Rampant Northern Crusades


This Tuesday night in the backwoods of Minmi we recreated an even more remote location - the Baltic regions in an unspecified medieval year. It was Northern Cusades night in Lion Rampant. This Osprey rules set is really winning people over. This makes me rather happy as i like wargaming in remote eras of the past rather than modern times. That and i get to use all my lovely dark age and medieval 28mm plastics from gripping beast and fireforge. Both are simply wonderful and great value too. 
These images are almost in reverse order for the battle so I'll have a go a retelling the battle in the same manner. 
The above image shows the turn or so before the end. The scenario was "Defend the Indefensible" and the shack and wagon were vital supplies that the savage tribes (who worship the giant forest rabbit of eastern Prussia) were eager to despoil. Here you can see the wild tribesmen and their well armoured leaders closing for the kill. At the end of the battle the crusaders activations failed them. Their crossbowmen quailed as the tribes closed in. 


The red/yellow spear unit has formed schiltron earlier and formed the main defense of the supply shack. Here the well armoured tribal chiefs were ready to charge in. Despite the additional armour afforded by the schiltron formation the chieftains proved too much to handle in the cut and thrust of melee. Their axes clove through the spearman's lines. 


Flanking the spear were two units of crossbowmen. Their deadly fire thinned the ranks of the incoming tribesmen but at the final hour the pressure proved too much and their volleys stopped. 


Here horse and bidowers attack the advancing tribesmen. The horsemen would be killed to a man in the vicious combat that followed. 


Before the rushing tribal tide came on. Flanked by bow and horse the Crusader leader felt confident. 


Not the best image but it shows the tribesmen lurking in the woods too cautious to advance into open ground where bidowers and horse threatened. A whole unit of aggressive foot was annihilated by bidower firing while they waited for support from their fellows. In an inversion of the later stages of the game, the beginning and middle saw the tribal forces sit idle as activations deserted them. 


The mounted sergeants jeered at their enemies to come forth from the woods and face their lances. 


Lock shields, men! Spear points to front. Give up not a yard of ground to the heathen. 


Aggressive foot run forward to gain the cover of the trees and try to goad the impetuous knights into an uncontrolled charge. 


The crossbowmen shoot from the cover of the cabbage patch. 


Masters of the battelfield - the armoured knights. These would only engage late in the battle due to the wild charge rule. This would have seen them careen into the woods to fight aggressive foot at a disadvantage. No-one wants to see their knights hacked apart in rough ground. 


Guarding the supply shack. 


The aggressive foot making for the woods. Crossbow fire would scythe through their ranks if not protected by the trees. 

The battle was nicely balanced by two very different forces. The Baltic tribes revel in rough terrain and are savage attackers with little defence to rely upon. The Northern Crusaders dominate the open ground with crossbowmen (against whom the tribes have little defence), bidowers, spearmen and a mix of cavalry to round out the force. Their cavalry charges are terrifying but these can be blunted by rough terrain. It proves for intriguing games every time. 

Lion Rampant is a great little game just perfect for short mid-working week games. Everyone picks up the rules in about 15 mins and not often does the rule book require consultation. Players can just get on with the business of striking a blow at the enemy. As wargames should be. 


Thursday 30 November 2017

IHMN Into the Desert or The Case of the Urchin

IHMN Into the Desert or The Case of the Urchin

The companies used were as follows. Please note that I believe in keeping armour low and only having a 2 characters per side with low pluck. Everyone should have a chance at killing everyone else and we all love an underdog. Players always cheer heartily when a lowly askari or bandit can rise to greatness through shrugging off attacks or felling a hero.

On the evening in question one of our usual players sickened with plague so the Cult did not enter the fray.

17 The Case of the Urchin’s Arse
Professor Hardwig’s Archaeological Dig
Name
FV
SV
Speed
Pluck
Talents
Equipment
Hardwig
+2
+2

4+

Sword, Pistol

O’Connell
+4
+2
+2
3+
Martial Arts, Tough, Duellist
Pistols, Combat Knife, Lined Coat
Old Tom
+2
+2

4+
Numb (Age)
Carbine, Combat Knife, Lined Coat
Timbo
+1
+2
+1
4+
Bayonet Drill
Military Rifle, Bayonet
8 Askari
+1
+2

5+

Carbine, Knife
The role of the Dig Team is to secure crates by dragging them to safety and keeping Hardwig alive.
+2 VP per crate secured AND +5 VP if Hardwig survives.
May not shoot Klinck, Dias or the porters.

Desert Bandits 1
Name
FV
SV
Speed
Pluck
Talents
Equipment
Tippu Tib
+4
+1
+2
3+
Tough
Sabre, Blunderbuss, Lined Coat
Kibonge
+3
+1
+1
4+
Terrifying, Fanatic
Halberd, Combat Knife, Pistol
8 Bandits
+2
+2

5+

Rifle, Sabre, Combat Knife


Klinck
+2
-
-
4+
May only defend.
Camera
2 Porters
+1
-
+2
5+


The role of the Bandits is to shoot Dig and Expeditionary forces. +1 VP per kill. +5 VP for Hardwig or Savage. (On the evening I removed the VP's for Savage's survival.) 
Additionally to capture photographs of British forces fighting Bandits. +5 VP per photo from table.

Desert Bandits 2
Name
FV
SV
Speed
Pluck
Talents
Equipment
Rabeh Zubair
+3
+2
+1
3+
Tough, Fanatic
Two Handed Sabre, Pistol, Knife, Lined Coat
Al Hurun
+3
+1
+1
4+
Tough, Numb
Sabre, Buckler, Lined Coat, Pistol, Knife
8 Bandits
+2
+2

5+

Rifle, Sabre, Combat Knife


Dias
+2
-

4+
May only defend.
Camera
2 Porters
+1
-
+2
5+


The role of the Bandits is to shoot Dig and Expeditionary forces. +1 VP per kill. +5 VP for Hardwig or Savage.
Additionally to capture photographs of British forces fighting Bandits. +5 VP per photo from table.


Scotland Yard
Name
FV
SV
Speed
Pluck
Talents
Equipment
The Detective
+4
+1
+2
3+
Erudite Wit, Duelist 
Sabre, Pistol, Lined Coat
His Chum
+2
+2
+1
4+
Bayonet Drill, Medic
Military Rifle, Lined Coat, Pistol, Bayonet
Officers (4) 
+2
+1

4+

Lined Coat, Pistol, Baton

Officers (4)
+1
+2

4+

Lined Coat, Baton, Military Rifle
NB: No member of the Yard may shoot at any Desert Bandit.
The role of the guard is to render unconscious to Expeditionary force. +1 VP per man.
The Detective and his Chum may engage Klinck, Dias or the porters in hand to hand only. At this close range their disguises are revealed. +5 VP for Klinck or Dias or +1 per porter (+2 if has photo.)
Deploys in Turn 2 via the Tunneller. May not surface within 6” of ruins (the Detective won’t do it.)

British Egyptian Expeditionary Force
Name
FV
SV
Speed
Pluck
Talents
Equipment
Savage

+3
+2
+1
3+
Inspirational, Numb
Lined Coat, Pistol, Knife, Sabre
Lacoste
+2
+2

4+
Fanatic

Boy
+1
+0
+2
5+
Numb
A Decanter
10 Askari
+1
+2

5+

Rifle, Knife
The role of the Force is to protect Professor Hardwig at all costs and shoot as many Bandits as feasible. Need to keep Savage alive - + 5 VP.
(MINUS) -1 VP per bandit shot.
May not shoot Klinck, Dias or the porters.

The Cult of Akhenaten
Name
FV
SV
Speed
Pluck
Talents
Equipment

Abir
+1
+1
+1
3+
Intuitive

Lined Coat, Pistol

Ray of Ra (Spitfire) + Water Bullets
Sairah
+3
+3
+2
4+
Fanatic, Stealthy
Combat Knives + Throwing Knives (Poison)
4 Nubian Guardsmen
+3
+1

4+
Fanatic
Lined Coat, Scimitar, Muzzle Loading Rifle

5 Cultists
+1
+1

5+

Club or Pistol (see model)
Mummified Priest
+3
-
-
3+
Hands are clubs.
Wrappings (lined coat), Harden spell.
The role of the cult is to kill everyone. Can’t win – just here to wreck stuff.
Cultists may deploy in Turn 2 within 3” of any sphinx on the table.


Last Tues evening saw a 5 player game of IHMN occur. Please read the written precursor to the game in the previous post as to what it was all about. We modify the rules slightly by moving two figures at a time per player to speed things up with so many and also by moving clockwise about the table from the person that rolled the highest initiative. 


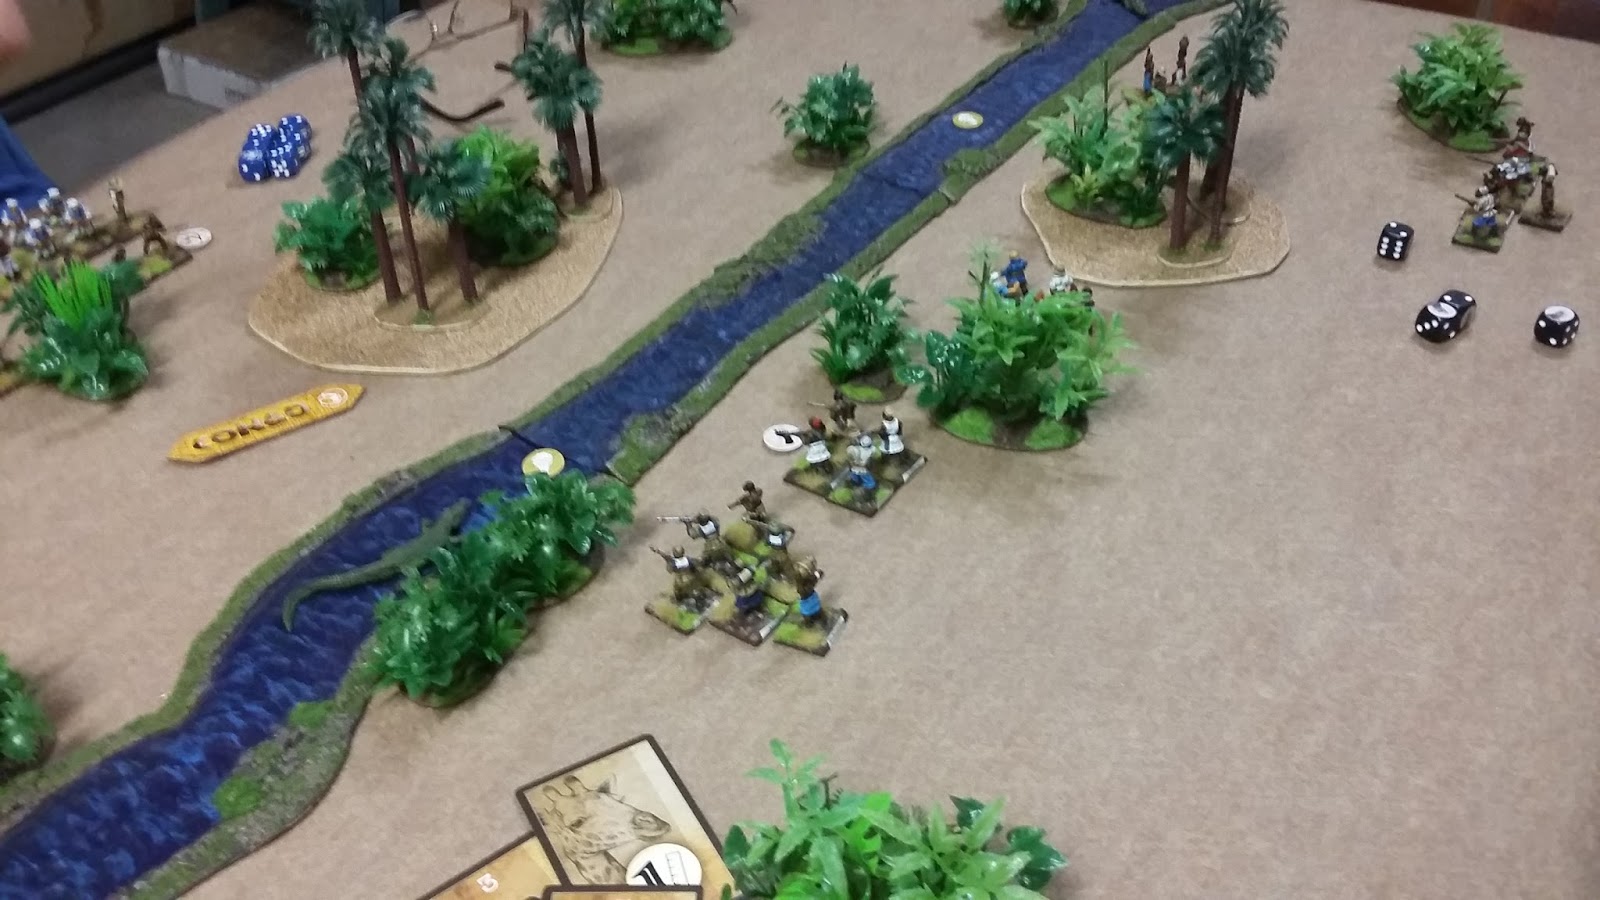
The table was set out with rocky hills, scattered stands of palms, a hamlet and many Egyptian ruins. I really like the look of my desert terrain and one of the reasons I designed this scenario was to use it all once more. The companies were all designed by me. I tried to be reasonably fair - but rarely do I use the point system.I like armies that are dominated by "poor" troops - Pluck 5 was average. 


The Hardwig archaeologist expedition. They were vulnerable in the centre of the table but had good cover. The red counters represent boxes of treasure to be dragged off the table. 


The British Egyptian colonial force. They took to the table quickly eager to find and secure the Hardwig expedition and eradicate any threats. 


The Bandits of Rabeh Zubair deployed from the flank. Dias is shown here with two porters. His aim was to take pictures of the British aggressively attacking. We treated the photography as a missile attack needed 7+. 


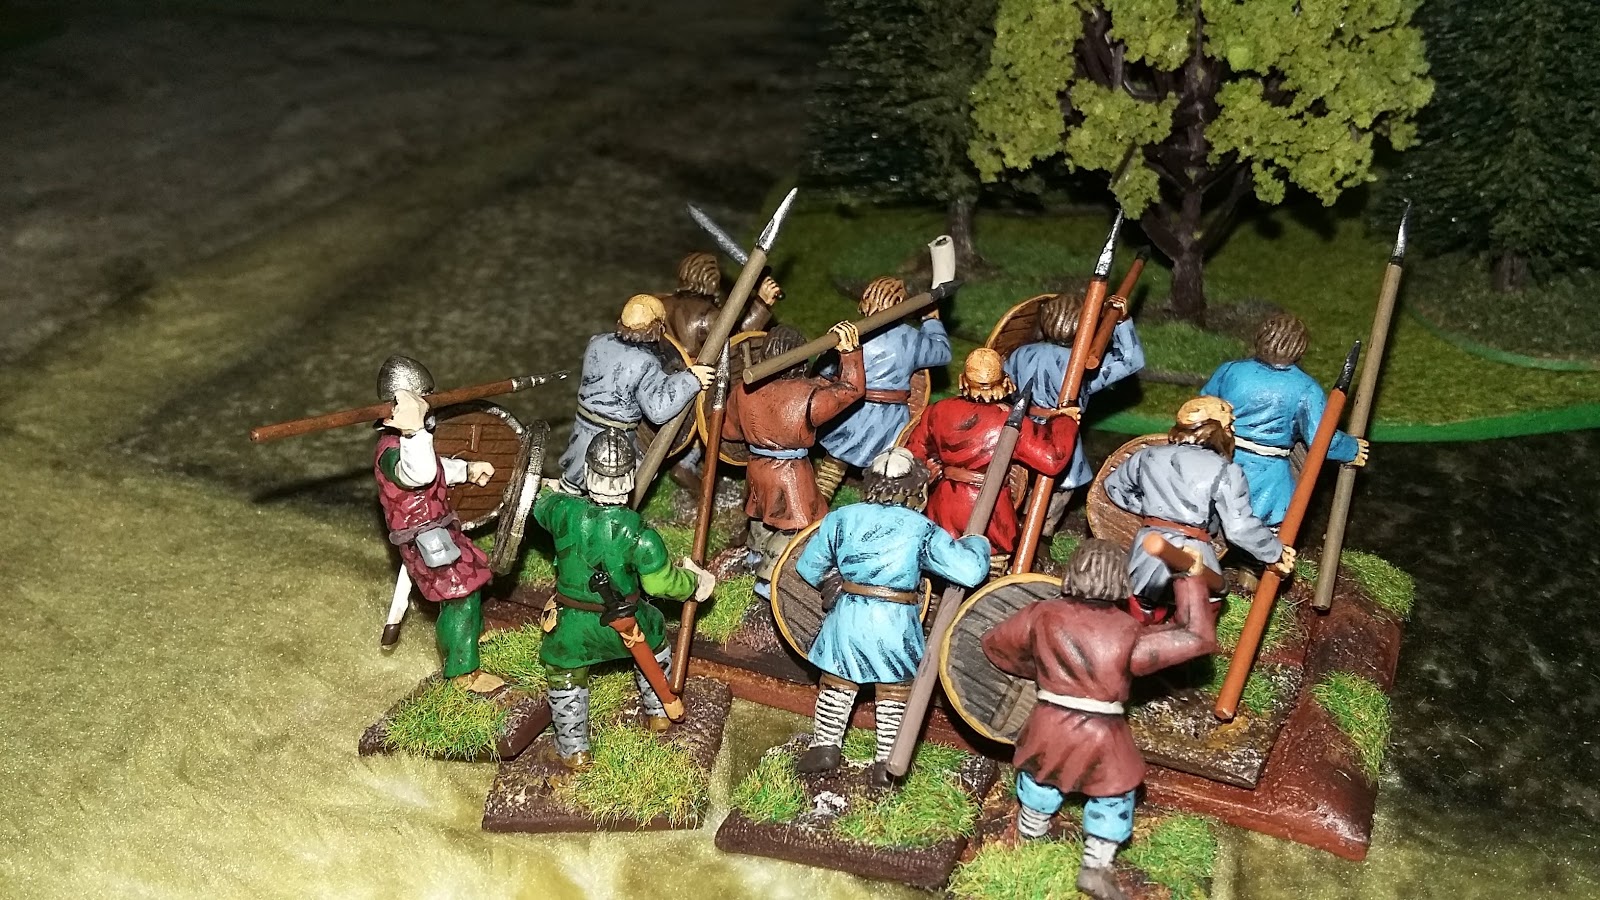
The men of Scotland Yard arrived in a dramatic fashion and in disguise. 


Here are the bobbies of the Yard in mufti. Once combat was joined their wigs would fall off and their poor burnt cork blackening would be revealed. 


Other bandits crept between the ruins eager to set up a firing position to snipe the British. 


These bandits quickly engaged. The British proved only too willing attempting to overwhelm this attack with their superior numbers. 


The bandits relied on the Arabic superhero - Al Hurun - whose cutlass whirled about him cutting soldiers down. 


Dias tried again and again for a picture. 


The other Belgian agent - Klinck - approached with his camera and porters too. These swift natives were ready to run once an incriminating negative was secured. 


Here too, alas, a photo was not forthcoming. 


The Yard were now revealed and pounced on the British forces, not to kill but to subdue. This would prevent an international incident. 


Major Savage, British commander was beset by the Consulting Detective and Watson. His men fell quickly but his servant, Boy, held on with grit and determination. 


The Bandit leader, Kibonge, wielded his spear with deadly effect. 


Al Hurun continued to swing his sabre but was beginning to tire. Savage repeatedly threw men toward the Arabic superhero. 


Hardwig's men seemed paralysed for much of the game until a sudden burst of enthusiasm drove them from behind the hill they cowered behind. By this time the Bandit leader, Rabeh Zubair, has charged recklessly and did battle with a lone askari - who somehow managed to fend of the blows of his enormous curved blade. 


In a display of insurmountable courage - Boy (who has just smashed his only weapon - a decanter of scotch - over Watson's head without effect) - then used his drinks tray in a improvised fashion. He struck down Dr Watson to the delight of his master - Savage. (And resounding cheers from all players!) 


Bandits battled askari. The hero - O'Connell - proved a dangerous opponent once more with both pistols and fists. 


Dias lined up yet another attempted photo. 


Battle raged across the table as four companies engaged in bitter melee. 


At last! Dias secured a picture. But two of the Yard's finest were in pursuit. 


O'Connell safeguards the Egyptian artefacts but none are securely taken from the table. 


The posthumous hero of the hour - Boy. For his fortitude and exceptional bravery his was awarded the highest accolade for a man of colour - the Tin Watermelon. (I can't remember who won our other player award for best in game heroics - the Iron Turban. This can only be won by a figure with poor pluck, few weapons and no skills.) 


Dias urges on his porter to run for the table edge with the precious negative plate. The next game would see the British trying to secure this before it leaves the Dark continent. 


No doubt the men of the Yard will be playing a key role. Although Watson will have a ringing headache and a large indent in his forehead from a silver drinks platter.