Tuesday 27 February 2018

French Napoleonic Army Done ... Almost


The title says it all. Almost. 16 infantry battalions, 12 cannon and 4 cavalry regiments. Also 14 skirmisher bases and 8 officers (including brigade, divisional  and Napoleon himself!)

20 skirmisher figures and I am entirely done. Well, there could always be more but I'm prepared to call 14 months of painting one project to a halt.


There are the cannon. A mixture of 6, 8 and 12 pdr guns. Foot and horse artillery. 


My army represents the 8th Infantry Division of Ney's III Corps in 1813. Souham orignally commanded but after he was promoted Michel-Sylvestre Brayer commanded. 

As the brigades in III Corps were quite large I haven't painted the entire division. I'm three battalions short of that. But given the beating III Corps took throughout 1813 it's no surprise all battalions were not present at all times. And that's what I wanted. I like painting the guys who do the bulk of the fighting. Not the elites but the conscripts. 


Here is Francois Bony's brigade - 6 battalions. How can you not love that name in this period? This mostly consists of line battalions. I gave the senior battalion of the regiment a tricolour (so if the third and fourth are present I gave the tricolour to the third rather than a fanion.) Due to the army being in a rebuilding stage at this time the tricolour could easily pass to the most senior or complete battalion in the regiment at that time. The tricolour looks good so I wanted them in the field - and 1st brigade has only one 1st battalion among its numbers. 


Above is Jean-Louis Charriere's brigade. This has four battalions of light infantry and two of line. I followed the same rules for lights and line in terms of figures. Only two of my battalions have "normal" uniforms. Most are a mix of greatcoat and uniforms - 50/50 - to show the nature of the French army in 1813. About a third have just greatcoat representing the "Marie Louise" conscripts. 


This is my heavy brigade of cavalry - my armoured fist. Commanded by Etienne de Pommeroux - these were not attached to III Corps but could have easily been in ordered to that part of the field of battle. And again ... what a French name! 


A little off centre but here are the latest painted. The Young Guard. I just had to have some for an 1813 army. Their numbers swelled and were used as a battering ram by Napoleon. This suits my style and my reasoning. Although Guard, these were not the pampered and little used Old and Middle Guard. These enthusiastic young men were repeatedly thrown into the most difficult and deadly situations time and again. A great reserve for my III Corps who stood in the thick of the action in a half dozen battles. 


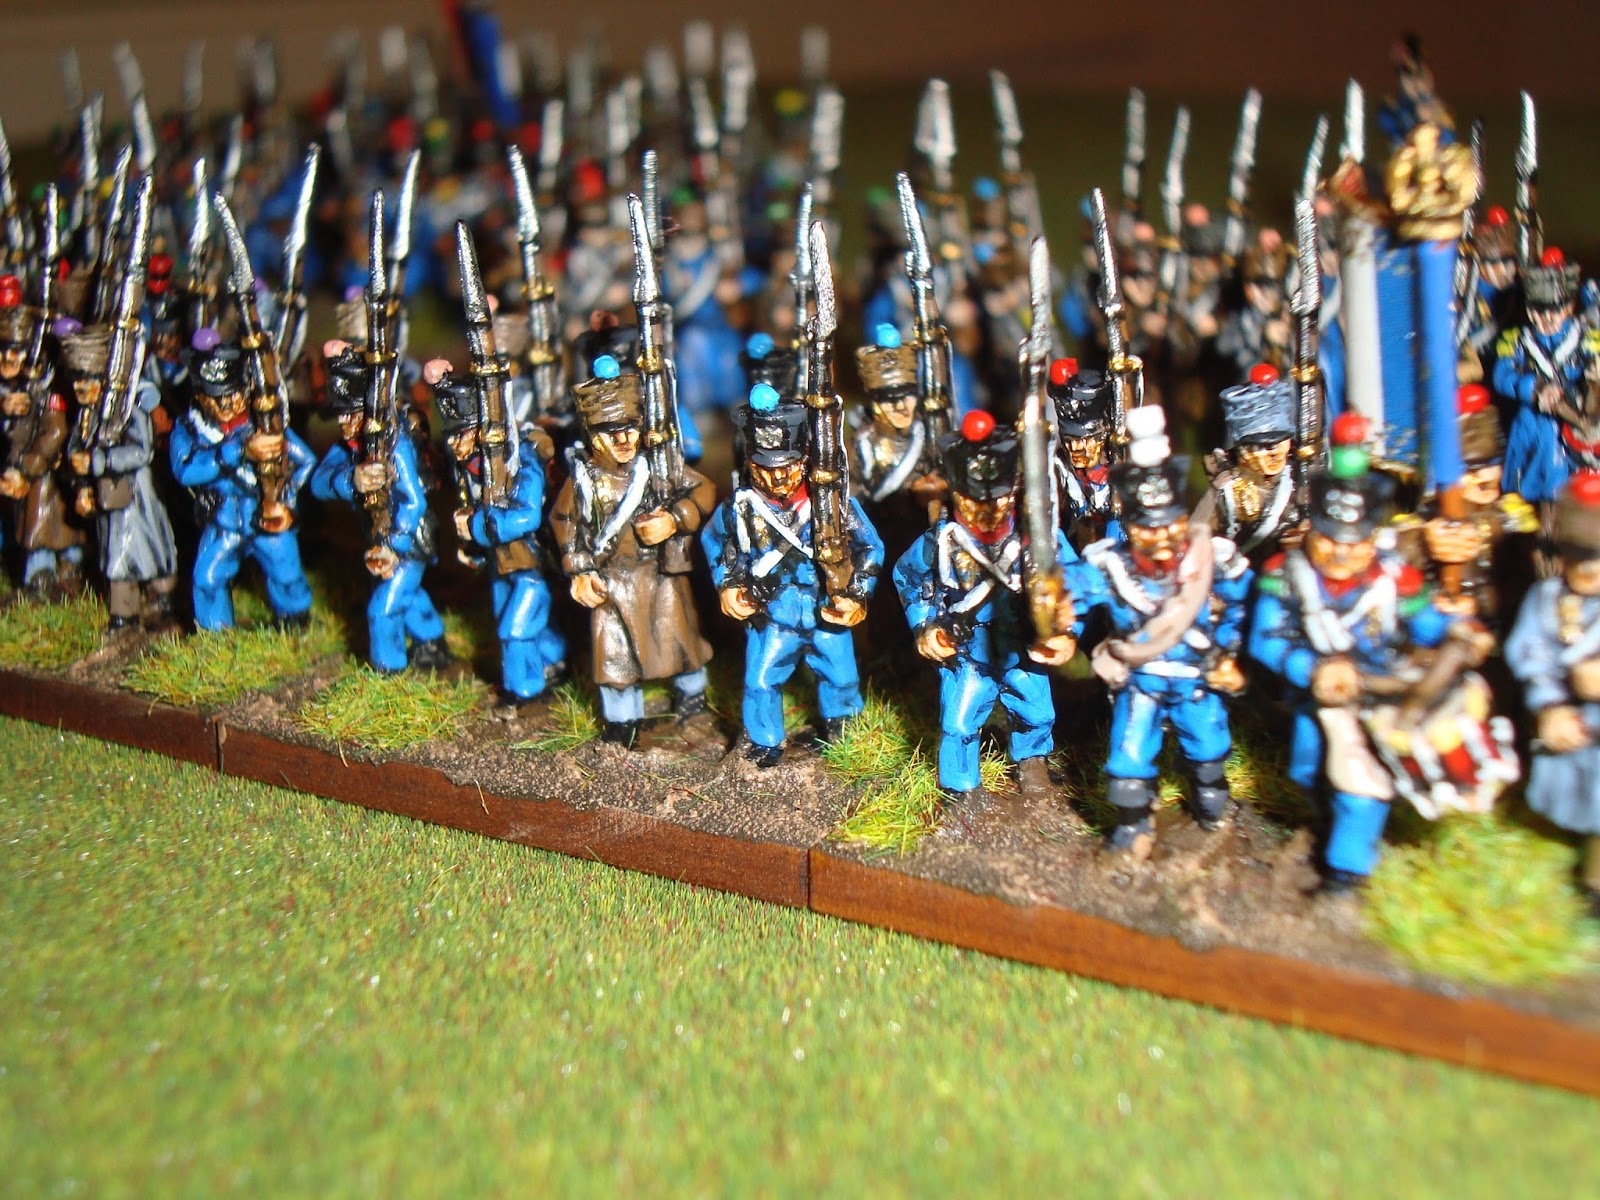
My Young Guard are all in their post Bardin reform uniforms. I know they should have some shabby uniforms and greatcoats too but I wanted my Guardsmen to just "pop." I'm not disappointed. As a block these guys look great. Ready to march into canister fire as the drums pound for the glory of empire and emperor. 


Fanions provided some problems as sources state voltigeurs had red fanions but figure companies sell a range of other colours for Young Guard. I figured the first battalion should have red then I just chose something nice from there. I imagined Guard flags to be very colourful and gaudy. 


As you can see Lacoste is in command of four battalions of Voltigeurs - a whole brigade of Young Guard - eager for the fray. I'd run these as more trained rather than veteran troops - but highly motivated.  


And my lighter cavalry. I don't really have enough of these. Chasseurs and Dragoons. The III were supported by the Baden Dragoons and the 8th (or 9th?) Hussars. I didn't paint these as I wanted some cavalry more representative of the bulk of Napoleon's cavalry at the time - and there were large numbers of both dragoon and chasseur regiments - while allied cavalry and hussar numbers were falling due to attrition and cost. They fill in very well. 

Here are some other pictures to mark the completion (mostly) of my French. What a relief! At times it was nothing but a chore while at other times a pleasure. I'm thrilled with the result - I was uncertain on the name tags at one stage but now I love the concept once more. I've done it with my other armies and it gives real character to your force (EG: Ha! You'll never stand up the the 1st battalion of the 22nd, you cad. Take this! - cried across the table as you send them in.)


The division commander (could be Corps commander like at Katzbach or Leipzig.)


Again, what a name! 

 Wonder if I'll ever put all on the table at once? 


Vive France! 

Saturday 10 February 2018

D'Erlon's Attack 2

To continue ... the aim again is to try to gather actual battlefield examples of the result of British line and French column (or line.) General reading would have us believe that the line should shoot up the column thus dispersing it (as British lines do in General d'Armee rules.) But did this happen? Knowing more here will help determine whether Lasalle (the rules I currently am trying) is a good representative set if rules. Or do I need to keep searching? 

Tonight I've found the following helpful passages ...


  • Historians still debate the kind of attack formations d’Erlon selected for this assault. In 2002, Holmes argued that he placed the columns of Quiot, Donzelot and Marcognet with a frontage of one battalion wide and twelve battalions deep in each column. This allowed a larger number of muskets to be fired compared with some columnar formations while still permitting a dense enough formation for shock tactics with the bayonet to be employed. 


(HUH? One wide and 12 deep allows lots of muskets? I don't get that. And compared to what ... a column of march?) 

  • Interestingly, Durutte disobeyed d’Erlon by using a wider formation for his division on the right flank of the attack and suffered fewer casualties in consequence.


  • D’Erlon’s I Corps advanced in 4 columns containing around 17,000 men in total. Historians are divided over what kind of attack column d’Erlon used for the assault but many believe he chose one of the older styles of formation when it would have been better to have adopted a newer more adaptable version, employing greater intervals between battalions and allowing it to manoeuvre into firing lines more easily. Assuming that he used the colonnes de battalion par division, these huge rectangular formations had a frontage of between 180 and 200 men and a depth of 8 to 9 battalions in about 27 ranks. Moving slowly in order to maintain their ranks, they advanced in echelon and presented an inviting target to artillery.


(HUH? So 4 columns at a depth of 8 battalions. That's 32 battalions. With a brigade of the 4th Division of being sent against Papelotte and brigade of 1st going against La Haye Sainte reduces I Corps attack to around 25 battalions. ) 

  • Riflemen of the 95th Foot laid down a heavy fire from the gravel pit, supporting the musketry of Bylandt’s Brigade as the French reached the foot of the ridge. 


  • The 95th also abandoned the gravel pit as the French came up and withdrew to defend the hedges along the Chemin d’Ohain.
(So the French columns weathered the rifle fire and fire from the Dutch/Belgians and drove the regiments back. Not a surprise given the numbers and the weakened state of the Dutch/Belgians after their earlier losses and hits taken from the grand battery.) 


  • Donzelot’s Division had now reached the crest and halted within thirty paces of the Chemin d’Ohain to redeploy. The sunken road and the hedges that lined it broke up their formation and the men bunched instinctively as their officers struggled to get them past these obstacles to reform on the other side. Here they intended to form firing lines and they had practised this vital manoeuvre many times during incessant drilling.

(So the French are advancing in columns and then stopping to redeploy before advancing into musket range.) 

  • Donzelot’s officers did not see them until they stood, and the French tried frantically to complete the difficult manoeuvre of redeploying into line as they emerged from the hedgerows. Attempting this in the face of the enemy was folly as their overconfident advance had brought them too close. 

(But the above intention is ruined as they are already in musket range from Pack and Best.) 

  • The redcoats now delivered a shattering volley at about forty paces, cutting down many of the French in the foremost ranks. Confusion set in among the French and, observing this, Picton ordered a bayonet charge ...
  • ... British infantry standing in double ranks ... 
(Yep the usual tactics BUT it was not usual for the French to be unaware of the British as they were in this instance. One question presents itself about the double ranks. References to the British standing in lines four deep in fear of cavalry charge become relevant here. One would assume this would make their usual line shorter and reduce the impact of the volley?)


  • Marcognet marched his division past Donzelot’s right considering it unwise to redeploy at this moment. He had begun to pass the hedges and was advancing against a Hanoverian battery when he was confronted by the 92nd Highlanders, who opened fire. In their dense formation, the French could respond only with the muskets of a far narrower frontage than the British line, which was only two ranks in depth and far longer. Realizing they were at a disadvantage, the French began to advance after firing a volley, hoping to decide the issue with the bayonet but now the cavalry intervened.
(So the 92nd did not break the enemy and they continued to fire and advance. The issue was decided by cavalry. But why order the cavalry in? The logical conclusion would be that D'erlon's attack - despite taking casualties was pushing Picton back with a chance of breaking the smaller forces (note that the French were advancing with around 25 battalions and the Brits were defending with around 14 - including the 95th and Bijlandt. Where was Picton's other Hanoverian brigade?) 


Another interesting note was that the napoleonistyka website notes that Picton's Division suffered 43% casualties. Given the ineffectiveness of the grand battery due to the muddy ground, reverse slope deployment and lying prone or crouching down, this means that D'erlon's attack is definitely doing significant damage. The high casualties would also be caused by the subsequent cavalry charges that were later endured of course. 

Conclusions ... British fire alone doesn't break French columns. French often try to form line with the Brits. Was the Brit double line on the day crucial in reducing the impact of their fire? The French took disordering losses from the guns and were drained by the muddy ground on approach. The French were surprised by the close appearance of whole brigades. The attack wasn't broken by Brit infantry but by their cavalry. The superior numbers - despite all these other detrimental factors - still resulted in the Brits being pushed back and/or threatened with breaking. 


No rules can account for all these nuances. Is Lasalle doing the right thing? I'm tempted to say yes but I still don't know. 

Friday 9 February 2018

D'Erlon's Attack

In an attempt to figure out the battle results of French infantry against British infantry for the purposes of determining good wargames rules ... I decided to examine the attack of D'erlons corps. I'm sick to the stomach of people just quoting reasons why the British should defeat the French in theory. I want to know what happened in the field.

And what a shit fight it is to find out anything. No one can agree on anything.

Many write that D'erlon deployed his brigades in columns with one behind the other. The idea being that troops from the rear could fill gaps created. But this raises a question ... does this mean troops from one battalion move up to form in the ranks of another? Or is this between companies INSIDE a battalion which withdraws to let another advance from the column?


And what type of columns in meant? References to "five paces" have been explained by five paces between battalions beside or five paces behind the first. What is it? The above image shows one battalion wide columns. But what do the blue lines actually represent? There are 8 blue lines in Donzelot'l column but 9 in the battaltion (did I miscount on the map above?) so which is it?

Again above, in Marcognet's brigade there are but 6 blue lines representing battalions but his brigade had 8 battalions? Picky I know but what the arse do these represent?

Another problem is many mentions of the British in lines 4 deep. Does this mean the entire attack is a bad example of Frenchn vs Brit combat? How are they lined up four deep? Does this mean a double thick line OR a company in the usual 2 deep formation supported by another company ... in a kind of double line formation. (Almost an attack column!)


Now the above confuses all the above. Here regiment battalions are clearly placed beside each other rather than in a deeper formation. Now what does this say about support from the rear? And in any case it certainly isn't what is shown in the above diagram. What the deuce is actually happening? 


Many write that D'erlon chose his formation based on his experiences in the Peninsula. And then people describe usual French tactics. Did he say he would change then get nervous and forget? What the arse is happening?

Need much more time to study the events.

Wednesday 7 February 2018

Lasalle Game 3


These images detail my third game of Lasalle. This has been a staged introduction where the first two games used only the basic forces. Tonight a second reserve force of cavalry was introduced. The Peninsula lists were used as everyone I seem to know just collects Brits. Doesn't leave much scope for my poor Frenchmen. (I don't overly enjoy the Peninsula myself preferring events in 1813 + 1814 + 1815.) 


The Lasalle turn sequence plays easily but does seem a little weird at first but once I realised the turns were cyclical then I understood much more. An example is a charge in your movement phase is resolved in your opponents reaction phase at the beginning of the turn. 


Another aspect that is interesting for our gaming group is command. We've chosen rules over the last few years that limit command in one regard or another. Lasalle allows a player to move everything he chooses to. This is a more traditional aspect of the rules but not confusing or unwelcome. Our game club likes to mix our rules. It is an aspect of Lasalle that I prefer over General d'Armee. Here the choices the player has over ADC's gives an impression of a high degree of control over your army. However, all your choices are at the whims of the activation dice roll. For no reason whatsoever a brigade that is under no enemy pressure may simply choose not to obey orders. Yes, this can be explained away logically - anything can really - but it is frustrating and undermines the command choices available. Why risk spending multiple ADC's when they might just wander off into a field to pick some daisies? 


In any case, this Lasalle game flowed nicely. We are sticking to the 16 turn limit (8 per player) which forces both sides to come to blows. Sitting back is hazardous - and not very fun. We really like the variable game end - this might see between 1 and 5 additional turns. Players shouldn't be able to thrown caution to the wind claiming "It's the last turn anyway!" 


The French gained their reserve cavalry forces early in the game where the British were forced to wait for their dragoons. This enabled the French to threaten the British line and force them into squares. While this happened four battalions advanced on just two British elsewhere. 


The above image shows the thin red line. Poor rolling for the Brits and good rolling for the French saw this side of the field crumble for the men in red. This led to some discussion at the end of the game over the point of being in line and were columns too hard to hold off. We resolved to continue to play the rules to test this a little more. This issue will probably decide whether the club continues to use Lasalle as three of five players have British armies - the other two have French. 

It seems A line has the edge on A column (4 shooting dice to 2 OR 5 if the line has skirmisher advantage) but when more than one column attacks the line is in trouble. This initially seemed wrong or a bit odd to us but there are a couple of questions raised by this. The Brits - in this game - were being hit 2 to 1. Should a British line be able to defend itself and win against two French columns? Also have we become used to the concepts of Brits mowing down columns? Should this be happening or should something else be occurring? 


I have resolved to have a much closer look at D'Erlon's Corps attacking at Waterloo to try to get a clearer picture. I chose Waterloo as I find it much more interesting than Peninsula battles. I know that lines of Middle Guard shot it out with lines of British Guard units later in the day at Waterloo suggesting there wasn't much different between those units when both were in line - but these are hardly "usual" suspects in terms of representative regiments. After an initial read of an admittedly general website similar numbers of French in columns (later lines) did push back the Brits/Belgians and had them at near breaking point. This would appear to support Lasalle's mechanisms. But further reading is required and I'd love to find our which battalions faced which in this attack. 


The final arrival of the Brit dragoons saw two French squares break. This game saw some quite dramatic combat outcomes. If you don't throw any fives or only a single 5 (or 6) then you can expect to die/rout quite quickly in this game. It's a bit hard to take at first but one thing we've discovered after playing even just three games is that you get a result easily within the time confines of a games night - and still have time to talk crap during, and analyse the evening after, the game. 

Again other rules can seem glacial in comparison. Things happen in Lasalle.  


The end of the Brits was quite messy. Stalemated by cavalry and thus unable to advance, French surged through the centre. The French artillery silenced the British cannon than swung into a flanking position while a single unit of conscripts - held in the second line - rushing through the gap created and onto the objective. The British failed their first morale roll - easy to do it was turn 17 (must roll over the turn number on 4 dice to pass) - and the game ended. 


Just to see what happens I released my heavy cavalry against a square. A large unit can sustain quite a few disruptions before breaking and if the defender rolls only one 5 or 6 on their 7 or 8 dice then a rout will occur (as long as the cavalry can roll 3 or more 5 +'s on their 7 or 8 dice.) Note cavalry combat dice are halved when charging a square. 

Another aspect of Lasalle I enjoy - and am relieved by - is the army lists. Players buy pre-determined brigades. Players cannot just buy whatever they like - veteran inf with elite heavy cav support and all heavy guns. You get a standard brigade for the period and campaign. I think our next step will be to go to two brigade choices on table and one reserve off. Might be too much for one night? The forces on the table during this game seemed quite sufficient - but the % of cav to inf was quite high. 


The French take the objective. 


Enfilading fire that was never unleashed. But looks so threatening. 


So the French scored a win and the rules are being roundly praised - AT THE MOMENT - but I fear long term that the lack of bonuses for British in line (or lines in general) will see these rules consigned to a dusty tomb before too long. GdA will probably win out and my search for a set of Napoleonic rules will continue ... drat. 

In short, after three games, Lasalle still produces a quick, action packed game that is easy to understand and logical. Units do seem to explode sometimes in combat but we haven't worked out the nuances of the game by a long shot - especially in defence. All have resolved to play more games and work on using lines against columns successfully.