Wednesday 29 March 2017

Maurice SYW Wargame - The Battle of Smoker's Grove

Technically the War of Maria's Mirkin was over. The Protestant powers had twice beaten France sending her armies scurrying back over the Rhine and into French territory. But Britain had not played enough games so another scenario was invented ... Austria would strike northward to try and sever the line of supply and communication between Hanover and the advancing British and Prussian forces. A win for the Catholic powers at most would end the war in a stalemate. 

Thus the battle began. Terrain for the battle was Forest. A low number of features were selected by each side ... all woods. The objective was therefore placed in an open field as other higher terrain features were not present. It would be the battle of Smoker's Grove. It would be the battle that I (the victor) felt outplayed in many regards. I did not have the initiative but was instead reactionary for several phases of the battle. 


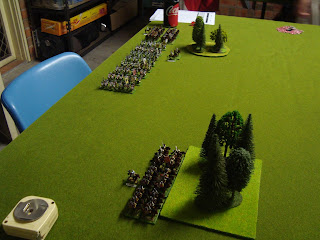
The Anglo-Dutch deployment of Lord Rodney Cocksmoker. The open terrain would hopefully aid the Austrians with their larger cavalry force. The British reserve waited in column to react to the direction of attack. 


The Austrians (Feldmarshal Wolfenberg) deployed out of cannon range (the British had three batteries to nil) and tried to convince the Brits that they could go either way. In reality the strong left push was obvious as was their cavalry force that would threaten the flank and draw away valuable reserves from the action. Stretch a small army and it will break ... the idea ... would it work? (Note the Austrians have a notable that enables units to move freely through terrain.)


The stalwart British and Dutch ... Steady Lads, Lethal Volley and Great Captain = National Advantages. 33 points ... leads to a small force. 


The Austrian foot ... which way would they push? Oblique order and Cavaliers = National Advantages. Oblique is one of the best advantages in my humble opinion. Underrated. 


The Austrian right flank. Three units ready and willing to turn a flank. 


The Austrian left ... almost all these units had arisen to elite status over the course of the campaign. 


Against the elite cavalry wing of Austrian stood the outnumbered cavalry forces of Britain, Holland and Denmark ... all trained however. A push here with the Cavalier national advantage would yield results for Austria.  


The British send four foot units forward to try and cut down Austrian maneuver opportunities. 


The Austrians moved their infantry to the left. This was the plan but I did not adhere to it. I felt afterwards that this was almost the point where I surrendered initiative. The question was ... will the British four regiments continue to advance or would the rest of the line come up? Was the British commander ... Lord Rodney Cocksmoker (of the Bristol Cocksmokers) near suicidal or did he have a plan? If the advance continued these isolated units could be molested in the extreme. 

About now the Austrians passed ... hoping to draw the British further forward and gain more high span useful cards ... their wishes were granted as both Coordinated cards were received. Many of our players believe this to be the most powerful card in the game. (it allows for players to activate two forces in the one phase.) 

With the Austrian forces employing a Chief of Staff and two notables in charge of each cavalry wing, the span of each card was doubled in ordering these forces. This has enabled the Austrians to threaten the flanks of other armies consistently. 


They marched out to the left ... continue or push back? If I returned I could isolate the four regiments pushed forward. If four units were taken then that would leave the British in a terrible position and battered in morale. 


Lord Cocksmoker engages his reserve. Will it be too late? These could support the infantry or threaten the Austrian cavalry that were supposed to be turning a flank. 


The Austrian infantry had been ordered back to their original position. The lure of taking the four regiments that were isolated so far in front of their army was too great. Was Cocksmoker committing suicide or was some plan afoot? With the Oblique advantage the Austrian commander (me) felt certain he could move 5 or 6 units into firing position on just four. With three cavalry on the right (ready to charge into the flank or onto units weakened by musketry) he felt secure. The three advancing British units in reserve could threaten the right wing cavalry so caution was needed. Again, the Austrians were reacting to the British moves. 


The Austrians took a risk ... carry out the plan ...  instead of preparing the infantry line to fire upon the British - the cavalry were moved into charging position. The Austrians were back on the original plan. This was going to hurt. 


Choose your targets men ... charge without mercy. One unit moved back to get around the rear of the centre if required. This could additionally threaten the flank of the British reserve that was advancing. The Austrian has too many units for the British to counter. Their firing would need to be superb. 

 Here an image is missing ... the British forward units advanced and used the Firefight card (in the Austrian phase) to precipitate a volley phase into the unprotected flanks of the Austrian infantry - who were relying on this turn to form up out of marching formation. This was the cost of advancing the cavalry. I felt confident with 8 infantry units against 4 I had the troops to absorb the blow even if events went awry. This was the case. Although units sustained 2 and 3 fatigues each stayed in the fray. The line held ... now the volleys would turn to Austrian advantage. 


The Austrian cavalry charged ... a good result ... each won weakening the British forces. Another charge would result in defeat on the right for Britain. Maurice cavalry charges sometimes require a little persistence. 


Now only two British units remain of the advance guard. The Austrians had flanked the line through the forest allowing four units to pour fire into three. It greatly aided the Austrians that two units - which were the main targets of the British - were elite making them much harder to damage. 


Now two remained. Could the British reserve close and flank the flanking cavalry? 

It was about now that Lord Rodney Cocksmoker (of the Bristol Cocksmokers) asked for the Honours of War. He took off his tricorn and bent to his knee (possibly knees) in supplication. The Austrian Fledmarshall Wolfenberg hesitated ... then refused ... the potential Epic Points for taking two more units were much more advantageous. Claiming problems with translation the Austrian officer refused Cocksmoker's request. This sealed his doom. In England the noose now awaited. 

Aloof, haughty and sure of his superiority, Wolfenberg stared down at Cocksmoker whose cheeks were smeared with tears as he pleaded with all his suctioning stamina ... but his efforts were greeted with aristocratic and dominant disdain.


Weakened by musketry the last forward British unit would be swept from the field even it it managed to win the combat ... (the Brits used on their advantageous cards to bolster their own combat score and reduce the score of the Austrian cavalry. But it was not enough - The elite cavalry status and the hits sustained tipped the scale of the combat.) The infantry were ridden down. 


The centre ... once there were British infantry ... now a semi-circle of Austrian attackers demonstrated the pressure of fire and sabres the British advance guard was subjected to. The right of image, however, shows the vulnerable position that the Austrian cavalry were in. But by now the Brits had lost their final two morale points. A roll of 1 or 2 would have extended the game by but a turn. The Austrians may have had a units damaged but nothing could halt this slaughter. 


The Austrian left flank. Three rampant elite cuirassier units ready to bear down upon the last of the flank. But this did not occur ... the Brits withdrew from the field hotly pursued by the Austrian cavalry. 

In the end a terrible victory to the Austrians. Six units were lost to but one ... and that one was a mercenary unit gifted to the attacker at the beginning of the game. No Austrian units had actually fallen. But the Austrian commander was left wondering ... so much of the game had he only reacted and was the British commander displaying desperate or almost suicidal tendencies? Or was this a good idea pushed too far? It was an aggressive tactic that reduced the choices of his opponent and caused me to prevaricate on my original plan. 

The Austrians eventually returned to their plan and annihilated the cavalry wing of the British. Their numbers of infantry accounted for the superior British troops. Their elite infantry clung on despite tremendous pressure then the centre was surrounded and dispatched. 

 The Anglo-Dutch were cut to pieces on the battlefield and then in pursuit. The Austrians gained 6 Epic points bringing them only 1 point from victory in the entire campaign. Lord Rodney had tried to push an attack that limited Austrian advantages and torn initiative from the enemy. But the plan ultimately failed. More elite troops, numerical advantage and a return to the Austrian flanking plan ripped apart the British troops sending their morale steadily plummeting until a major victory was reached. 

Hurrah Austria! Hurrah the Empress! France was saved and the Protestant powers driven back. The War of Maria's Mirkin has been declared a draw. With a single battle, even a defeat, the Austrians will win the campaign. They are undefeated in 5 games and a cavalry army - that was considered ungainly and difficult to use at the outset (mostly by me it's commander) - has ultimately triumphed over smaller more infantry specialised armies. To rub salt into the wound the Austrians gained their 4th notable after this battle ... this increases yet again their ability to command troops over a wider area while their enemies must keep theirs compressed. 
Friday 24 March 2017

Sword and Spear Ancients 15mm


This Thursday evening saw a 400 point game of Sword and Spear with Early Imperial Roman against the forces of the Pontic King - Mithridates. Rob returned to the earlier Roman list after trialing a later list with large units of impact troops which didn't match his expectations. 


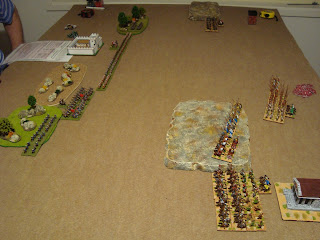
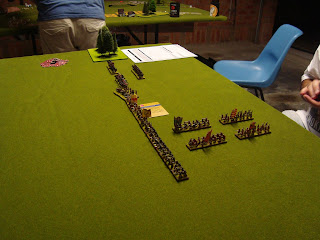
The Romans above with their fortified camp. They decided to drop a sub-general hoping that the camp would keep troops in command. The Romans are always wary of being flanked and like to pay a defensive game. 


Mithridates can be seen behind two units of pike. These are discipline 5 units and can be hard to motivate to move, charge and they just don't rally. But they are still pike and with 6 hits don't moev too easily. 


I was trying my scythed chariots for the first time in this battle. I think they look great but would prefer to have another unit of light cavalry or peltasts for the points. 


The Temple of Apollo stands in the background and before it the Pontic left wing. Heavy cavalry backed up with thracian foot and javelinmen. These would try to turn the Roman right. (Sword and Spear is usually always decided on the flanks.) 


The early turns saw the Pontic plan materialise. Don't fight the strong Roman centre and work around both sides. My imitation legionaries would try to hold the hill while any bonus dice would drive the scythed chariots into the Roman horse. 


Mithridates struggled to get the pike block moving. They weren't too keen to go forward at the Romans in any case. I hoped I could decide the battle elsewhere before most of the Roman legion could march into contact. 


The Romans decide to storm the hill ... a little sooner than I hoped. 


Those pesky auxilia on the far right had moved into a position which prevent my chariots from smashing into the horse. But, in turn, the horse would have to charge my heavy foot ... then my chariots would thunder in ... what a plan!


Wait for it ... 


Blast and bugger ... the Roman horse charged and annihilated the imitation legionaries in a single combat then pursued through ripping apart my chariots before coming to rest on my second line - the Thracians. This medium foot unit bought this monumental charge to a halt inflicting two hits on the horse. There was now a gap in my line. But now Tyche - who had smiled so favourably upon the Romans with this charge deserted them ... from here onwards in the battle they would struggle for good activation and combat dice. 


This photo should have been just before ... you can see the gap created by the Roman cavalry as they race onto the hill ... their pursuit will have them impact into the Thracians in seconds. 


Here is cavalry versus medium foot. In the background my cavalry has charged into the auxilia on the end of the line. Another Pontic horse unit is moving around the flank. In the distance are two dead cohorts ... I'll describe the fight in the centre soon.


The centre saw two Roman units assault the remaining imitation legion manning the hill. This was the first sign that Fortuna had turned her back on the Romans. Two cohorts charged and both recieved three hits for their trouble. When Mithridates goaded a pike unit into charging the Roman cohorts their final hit was taken. Now the Roman flank was in danger. 


This is quite simply going to hurt ... the Roman line was being rolled up. 


One Roman cavalry unit against 4 Pontic units ... it didn't last long. Six Roman units had routed from their Right flank. The battle was drawing to a close. 


The Pontic right flank executed the plan very well. They were deployed far out in a position to ride around the Romans and threaten their camp. The Roman general committed three units to try and prevent this and it also delayed the advance of several other cohorts who were wary of exposing their flank if the Sarmatians turn back into the fray rather than continue to flank the Romans. 

This is what they did and their ferocious fighting qualities soon won over the Romans whom the dice gods had cursed. 


And thus it ended ... a steadfast cohort was caught in the rear by Sarmatians and flanked by more imitation legionaries. In the rear can be seen two Roman units who were simply left in the dust after trying to guard the camp against a more mobile enemy strike force. 

The Romans were decisively defeated. Pontic losses consisted of one pike block and one imitation legionary unit. The cavalry advantage of the Pontic army is hard for the Romans to deal with ... especially if deploying in the centre of the table. Trying to defend the fortified camp was also probably a flaw as the additional cohorts could have decided the contest in the centre. There was only a one unit advantage for the Pontic force over the Romans but both their flanks were turned. After an early incredible charge things did not go the way of the Romans. A comely goat should be sacrificed to Fortuna at once. Mithridates and his Pontic force will rejoice at humbling the greatest empire in the world ... the last heir of Alexander has triumphed. Rematch in a fortnight. 

Thursday 2 March 2017

Dark Age Sword and Spear

It was a chill morning that greeted the men from Wessex and Merica as they rose and readied their weapons and formations. Athelstan had pressed far to the north and York, his target, was visible in the distance. The men of the Danelaw, and those Northumbrians who stood for an independent northern kingdom, stood firmly in their path united by the fierce Eric Bloodaxe. He had sworn to stop this tyrant who threatened to gather all Britain under his sway by the point of his sword. Now nothing could prevent a collision that would force a new political reality upon all - English, British, Danish and Scot ... even the slavers of Dublin would be forced to pay heed to victor of this momentous day.


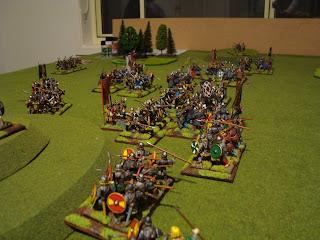
Part of the Viking line. 

The rules used were Sword and Spear and the armies were (roughly) 400 points. Both armies had a General and two captains. 

The Saxon force consisted of ... 
3 Lesser Fyrd 
6 Select Fyrd 
4 Thegns 
2 Javelinmen 

(I chose to reduce the points cost of all Thegns and Fyrd by ignoring the spear cost. In this battle no cavalry would be used and spear offers no benefit against foot troops.) 

The Viking army was ... 
3 Huscarls with Two Handed weapons (dane-axe) 
8 Warriors
2 Archers 

(Despite the image in the background of some photos the Viking stockade does not resemble a Fortified camp - even though it could. Maybe in a later game ... hmmm ... perhaps an attack by Mercians to retake Repton ... will need a saxon church though ...)  


The Saxons deployment with a double line of troops protecting their longhall camp. Athelstan stood proudly in the centre of his men. 


The Saxon right relied on this steep hill. It was difficult going which slowed all movement to a crawl and prevented units from generating impetus dice (which we only recalled near the end of the game.) 


The Viking centre pushed forward with Eric Bloodaxe leading the huscurls. These experienced warriors wore stout coats of mail and wielded large daneaxes - enough to splinter any shield. 


On the Viking left a strong force pushed toward the hill. Bloodaxe had little depth to his formation and spread his troops in a line trying to extend past the Saxons on both flanks. Lurking behind here can be seen the beserker unit which would play a bloody role later in the game. 


The first blow was struck by the Saxons as a unit broke ranks and tore down the hillside impacting heavily into one unit of huscarls. It took three hits in the initial combat. 


The Saxons strove to fit their large numbers into a confined space between steep hill and wood. 


Athelstan led the fyrd of Wessex against the Huscarls of the Danelaw. Theoretically this should have been a massacre but the farmers would stand their ground manfully. 


The Viking placed their troops in a near straight battle line across the field. 


Both sides paused before widespread conflict insued. Bloodaxe was struggling for good activation dice to press his advantage on the wings. This was slow in coming allowing the Saxons to advance in the centre.


Forward! 


Send them back south! 


Four 1's is no way to fight and in this dire roll the Viking unit advantage on their right side was lost. The Jarl commanding this flank was also cut down reducing command and rallying possibilities across the field. Odin, Thor and Loki were subsequently invoked by Bloodaxe to mend this disaster. 


Across the table now battle raged. The Vikings were hesitant to mount the hill without their flanking force in position. They relied on their two handed axe men in the centre of the table. 


Fatigue mounted on the Viking side but they clung in the battle. One fyrd unit fell sending a huscarl force barreling forward in pursuit. Here it fell afoul of the Saxon reserve force and it was forced to struggle against two Saxon units. At this stage the outcomes for the Northmen looked bleak. Despite a rush of initial command dice from the cup, two Huscarl units were each beaten in turn by a single Lesser Fyrd unit. 


Finally the Viking left plodded through the rough terrain. 


The Beserker were finally in position. 


The red numbers indicate the numerous points of damage/fatigue suffered by the Vikings who were clinging on. 


The archer unit turned the flank of the furthest Saxon unit and routed it in one turn. Their shieldwall did not protect against flank attack. The archers continued straight into the next Saxon force inflicting more wounds. 


The pursuing huscarl unit fell leaving a hole in the battle line. A thegn unit surged through. 


The beserker charge with impact smashing a Saxon unit. Now Bloodaxe furiously sent orders to the Viking units on their left to turn toward the centre. But the terrain slowed their relief march. 


The centre near the end. On the left the beserker were almost across the hill after breaking two units. With two huscarl units fallen Bloodaxe stood alone with the last remaining. It needed only a single hit to rout it. A unit of Saxon thegns has broken right through and would soon be in position to threaten the Viking camp. The archer unit's pursuit and destructive charge had finally stopped but it had inflicted many hits. All other Viking units had fallen in this area (3 alone in the final turn.) 


The other angle. Viking units were sparse but the Saxon army had fallen from 13 units of heavy foot to just four. Their army had broken. Bloodaxe had reached his demoralisation point and if he rolled a 1 for his huscarl unit these too would rout ensuring a mutual break. However this was not to be and Eric Bloodaxe's iron resolve held his men in place. 


It has been close ... very close. The initial combats and command dice favoured the Saxons but (as usual with sword and spear) momentum usually shifts. The Vikings steadily took units from the Saxons who sustained over 30 points of damage as 8 of their 13 heavy foot units were lost. The Vikings in turn lost six - three in the final turn almost routing their army. For the Vikings, finally turning both flanks won the day although the deeper formation of the Saxons certainly wore down the main Danish line. Athelstan did not try to bring his superior numbers to bear but instead used the terrrain to wedge his army in then funneled troops in from the back as the front line fell. For a game that essentially used only heavy foot units (about 24 in all) both players certainly had fun and felt it was a more tactically interesting game than it might appear on paper. 

The impossible had happened. Athelstan's grab for total power and widespread tyranny had been temporarily halted. Bloodaxe was triumphant. Sound the horns and prepare the meadhall! Danelaw and Northumbria remained free. But Eric would need to reorganise his forces as Athelstan would be sure to draw on his reserves of manpower and return for another attack. Time would tell.