Thursday, 23 August 2018

Order and Chaos

This week's offering to the gaming gods consisted of a side of Star Wars with a libation of Sharpe's Practice ACW.

Both games were enjoyable and fun was had by all ... but what happened?

Ian (Confederate) and I (Union) renewed our feud once more. On the other table Nic had supplied everything - including a lovely space gaming mat - and was Admiral Akbar to Jason and Micko's Grand Moff-Tarken (I have no real idea how to spell that.)


Sharpe's work very well for ACW. As in previous posts we use a stand of figures to represent a figure. We consider each unit a regiment and the rules respond kindly. I always supply the Union with an additional command but the Reb's have superior troop quality and therefore higher morale. Given the card based activations, it is very hard to bring a numerical superiority to bear as usually parts of each force seem to receive cards irregularly at best.


The cards do represent the ebb and flow of battle initiative quite well as each side seems to enjoy periods of every game where a run of activations allow a side temporary dominance only to fall into lethargy later. Perhaps their energy is temporarily spent (I do note though that gamers imaginatively like to create explanations to justify any rule aberration or nuance to keep their favoured rule system being played ... Am I doing this here? I'm not sure I'd know even if I was.)

Back to the game ... The Union were aggressive this evening and pushed forward with all commands quickly. The dice decided to limit this advance and replicate some prevarication of less than competent commanders in the Union ranks - trans. I rolled low for movement throughout the night.

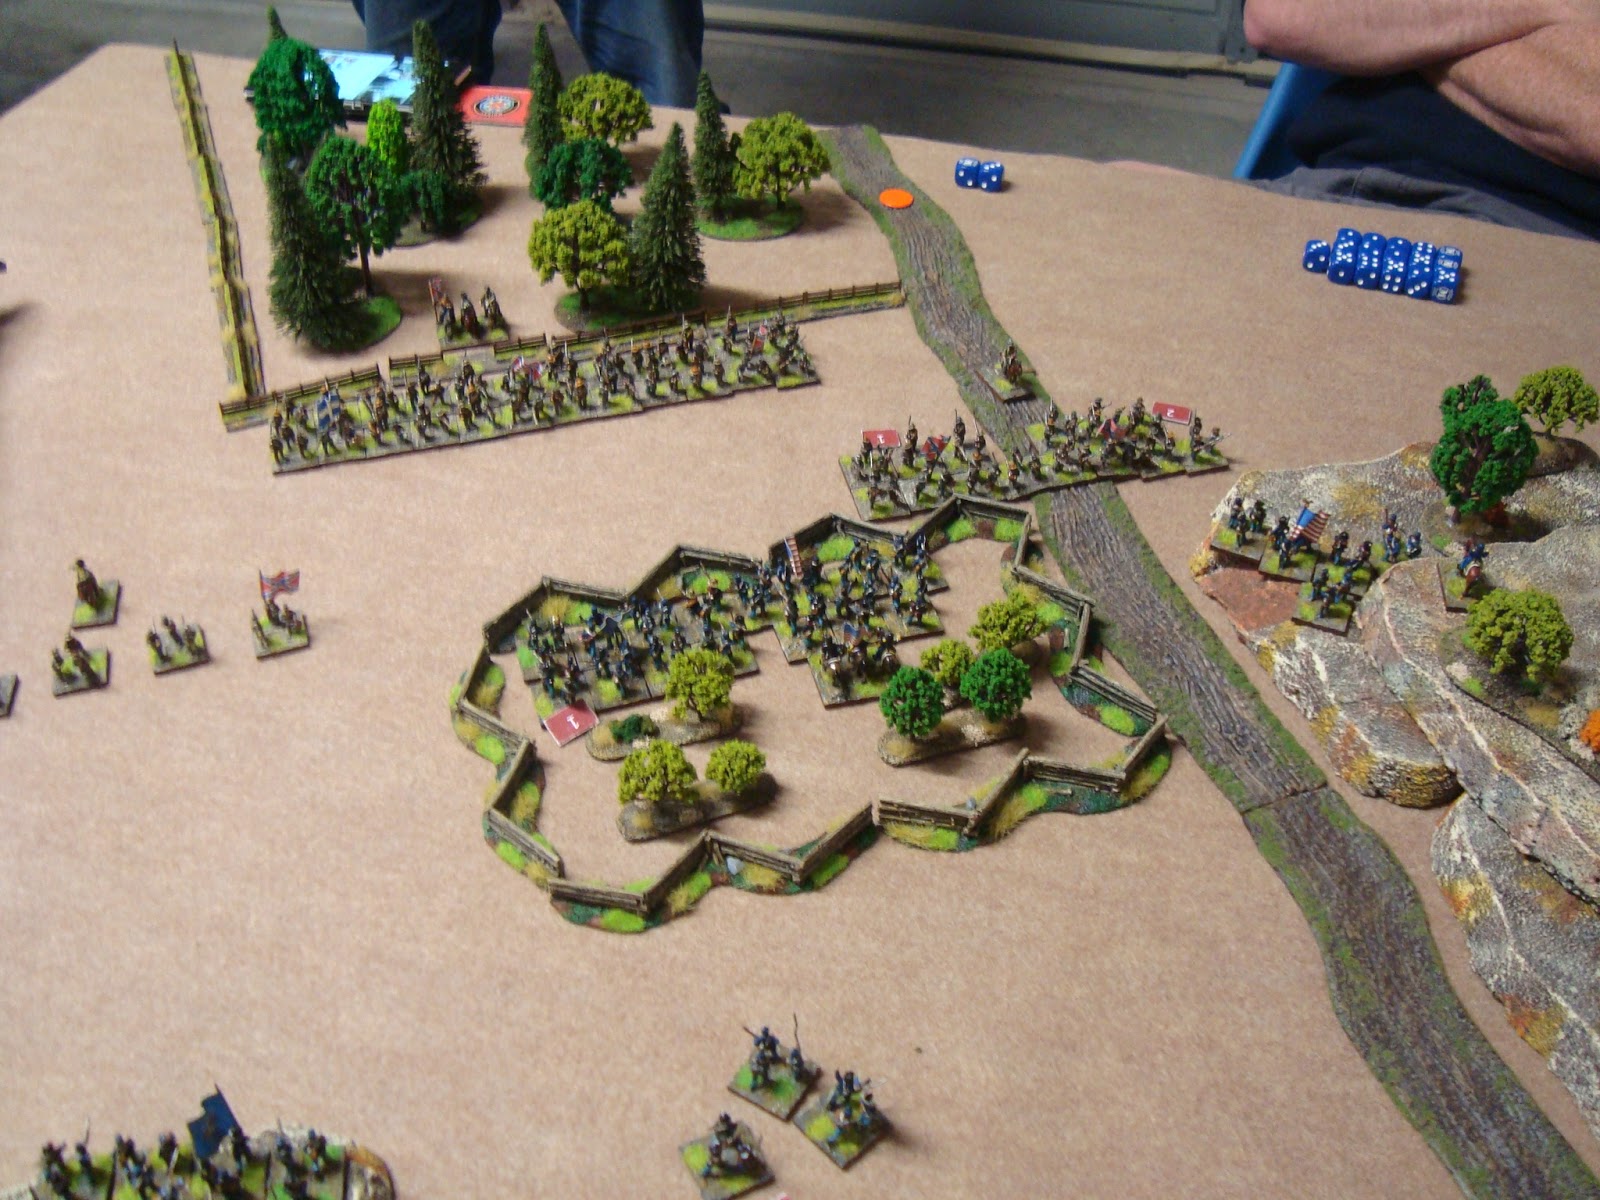
The Southerners pushed forward with their skirmishing troops infesting Old Scroggin's Orchard and Turkey's Knob - a central high point on the battlefield.


Before too long, the main brigades of both sides deployed and struggled free of woods and fence lines to take better positions. The Union established a strong line along the snake rail fence which was built beside the main Lushville Lane. 


However, the Union commander - confident in his numerical and moral superiority - ordered his men forward to gasps of amazement from the Rebel General Blackcat. The Union skirmishers threw caution to the wind and charged the Reb's in Old Scroggin's orchard driving them from their position and taking it for themselves. From here successive card activitations fell for the Rebs who poured fire on the Union skirmishers and they played no other role that evening. 


By this time the Union battle main battle line had advanced and was eager to take the orchard and make it into a fortress. If only their flanking forces could advance their position would be safe and the rebels would have to chance risky tactics to dislodge them. 


The Union right failed completely to support the centre. One Union regiment was ordered to charge and drive the Reb skirmishers from the brush on Turkey Knob. Poor movement saw them repeatedly raked by volleys which led to an accumulation of shock. This resulted in removal of combat dice and the Union were sent packing. 


Meanwhile ... space things happened. 


I have no real idea what happened. 

But doesn't it look nice. 


Then the cards displayed a fatal shift of initiative against the Union. 


Once in position they lost their nerve - perhaps disordered by terrain or were the Confederate troops energized by this threat? Volley after of volley crashed out from the Rebel line disordering, injuring and killing the brave northern men. 


Shock and casualties grew but - as often happens in the Sharpe's Practice games - it did not effect the moral of the Union in any way. Sure their combat effectiveness was severely curtailed but it did not bring the South any closer to victory. 

(An afterthought here is what would have happened if the Confederate's had risked a charge? Probably victory - with some "acceptable" losses but they are lead after all - and this would have resulted in multiple morale loss rolls for the Union. This may be how it is supposed to be played?)

For the Reb's their moral had been slowly falling throughout the evening as they lost several combats, leaders and a unit here and there. BUT ... again a quirk of Sharpe's is that if you roll low for morale loss your force will succumb VERY slowly indeed. 

It always reminds me of "The Death of the Thousand Cuts" when I play Sharpe's. The morale system needs a tweak. 


So at the end the Union morale was still high but the South was down to just 4 of a once proud 11. Yes, the Union were just about to lose quite a few - if they didn't retire - but probably not quite that many. One attempt at retreat by the North led to a total of zero movement as low dice, terrain and shock combined against this order. There would definitely be more blood before the soldiers would reach safety. Who knows ... high rolls here could see the Union morale tumble - but they still had 10 of their initial 11. 

Due to the advance of the north, the rebs had the whole table to march before reaching their objective - Syd James' Crossing - and the North still had three strong units and a working battery to pepper the rebs as they came. 

Both sides agreed on an amicable draw as it was late and neither side could move from its strong point without ensured destruction. As the sun went down the cries of the wounded could be heard echoing from Old Scroggin's Orchard but each force knew it had done its derndest and were not ashamed for their efforts, bravery or the cause for which they fought. 

The commanders knew that wargames was the winner once more. 


Wednesday, 8 August 2018

Flashing Scimitars


This week's game saw the second return of an old friend - DBR. Many years ago - perhaps 15 or more - I really liked it. I have always enjoyed DBR on a smaller scale - around 20-30 bases - but I have no strict limit. For several weeks/months I have been dropping the name 'DBR' as regularly as I can without pushing the issue. One player, Ian - my opponent for this game also - has been driving very hard for months to play more renaissance gaming. This has found support but few of us have such armies and no-one can really agree on rules - but that has become endemic over the last twelve months in our group - and I cannot claim to have not taken an active part in this process.


I had proposed a solution ... an eastern renaissance match up ... but in DBR.
It didn't happen straight away ... but we are a club of varied tastes which plays many games.


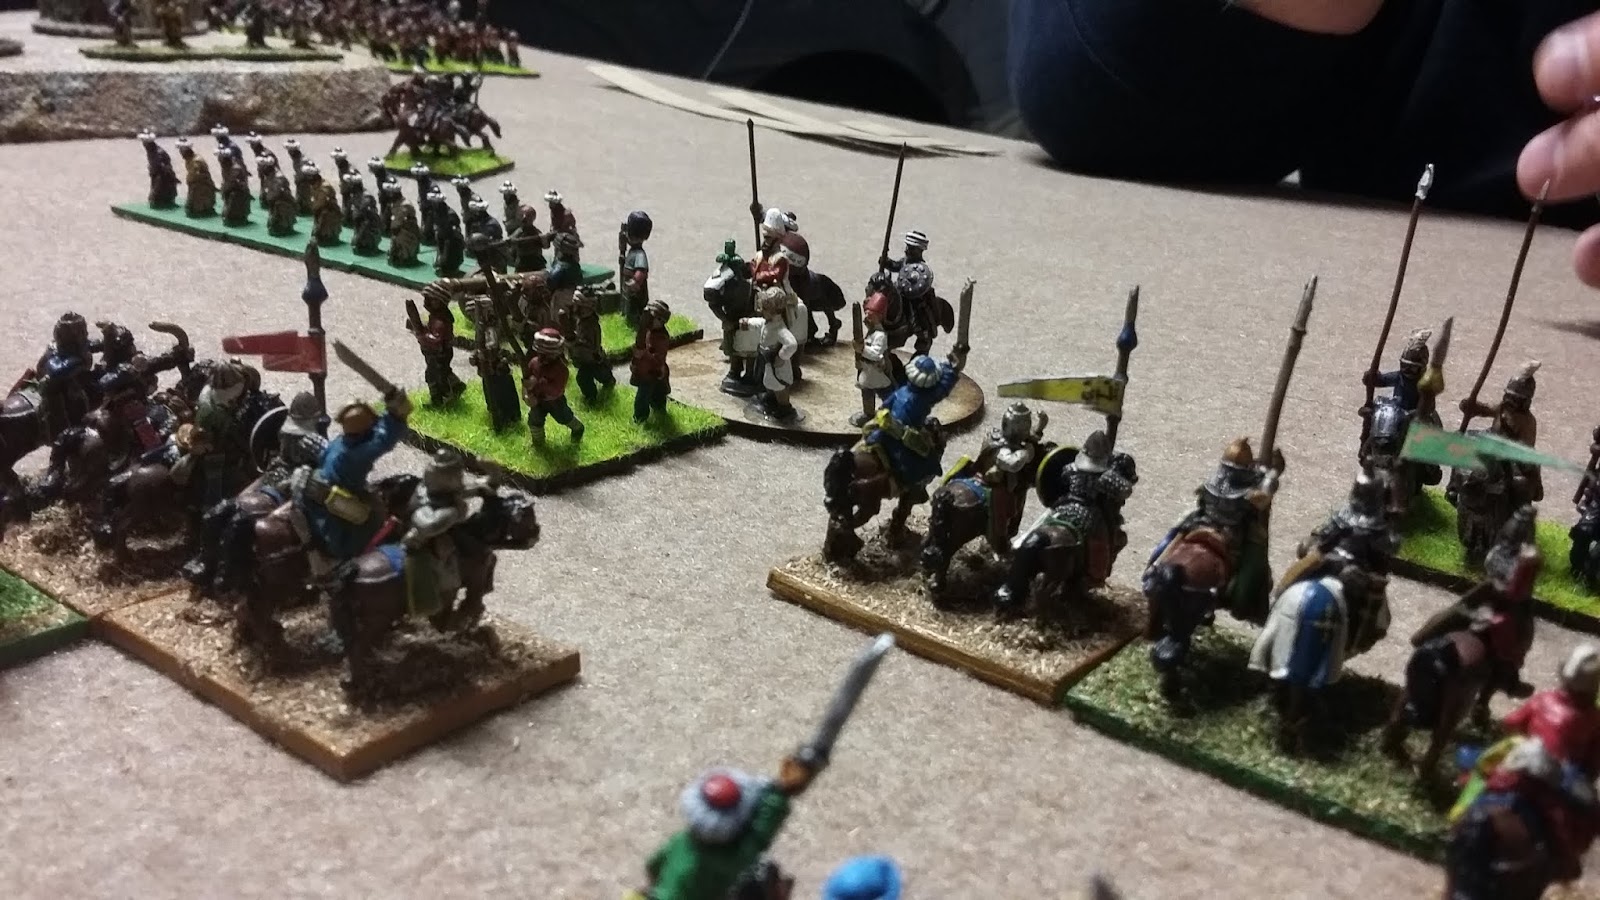
In any case, the second DBR game occurred with my medieval Turkish army pressed into service as Safavid Persians while Ian ran his Later Ottomans as ... Ottomans. We played with 300 points and 2 generals each. I like to play a relaxed version of the rules. Time period was around 1550.

Ian played a defensive game with his main battle line of cavalry, janissaries and azabs while he pushed forward akinjis on each flank. My Persian Shah decided to advance slowly in the centre while using a stronger force on each flank of Turkomans, light infantry and feudal cavalry.

The Turkish Pasha hoped the massive bombard - that 100 oxen had dragged to the field - would disrupt the advance and battle groups of the Persians. It didn't.


Above is one of my flanking forces swinging about the hill after they had dispatched the akinjis - one of whom had fled off and lurked in the background.


The main Ottoman battle line were held steady by the Pasha's orders.


Prayers and cries echoed across the plain but there was little movement in the centre.


On my other flank I had also driven away the akinji force and now eagerly trotted to meet the azabs. My men knew Allah was with them and were sure of victory. They were deluded.


With the flanks secure it was time to advance in the middle. The Shah felt sure he could crush the Turks with an attack on three sides. He would see the vile Pasha flayed alive before the sun set.


And battle was joined ... arrows flew, horses whinnied, scimitars flashed and men screamed blood curdling cries. The lines of sipahis surged back and forward with only a base or two lost. The generals of both sides were influential in keeping the lines in place. The superior class of many combatants also aided this.


Meanwhile, Ian had been forced to order some of his centre cavalry onto his left flank to meet my advancing thrust. For several turns the struggle surged back and forth before additional light troops turned the table by providing an overlap.


The guard cavalry from both sides clash again and again.


Iranian cavalry have cut through the janissaries but behind the azabs have annihilated the advancing left wing. Their bows did what arquebuses could not and scythed through the galloping horses at longer range. If the azabs could swing onto the Iranian flank the battle would be lost.


Not quite a final image but an overview. The Ottomans broke first but the Iranians were only two bases away. The azabs were certainly the surprise packet of the evening - Bw (I). The Persian right hook pressed into the Turks and took the last couple of bases but not before the Shah fell in the thick of the fighting. But this was masked but the whirl of dust and noise of battle and it was not until later that the Persian force withdrew mourning its brave leader. The Turks had lost many men - especially their janissaries - but these would be replaced and this defeat would be avenged.

Both players enjoyed the game and I'm sure the Ottoman invasion will not be delayed for many weeks. My memories of DBR were justified and I have found the recent games just as enjoyable.

Wednesday, 25 July 2018

Sharpe's ACW Wargame


I've had an interrupted year of wargaming. Increasing demands from work, a disappointing end to my last wargaming project and wanting to spend time with my daughter have all eroded my desire to wargame and paint. This has never happened before. 

I am trying to soldier on and hope the spark re-ignites. 

This week's game - on the suggestion of my good friend Nick - led me to an enjoyable return to the Lardies' Sharpe Practice II in the ACW. I use my ACW armies originally painted and based for Fire and Fury. I use one base to represent one figure in Sharpe's. This gives the impression of moving regiments around and the rules feel just right for the task. 

The scenario was Sweep the Table and the year was 1863. This Confederates were using the basic list from the Sharpe's book while the Union had their basic list plus an additional command of two units of infantry. The Union were attacking, trying to despoil the supplies of the Rebs. 


After all the early marching favoured the Union, the Rebels sprang to life. They led with their skirmishers and the smaller command of infantry with their larger command of three infantry units trailing behind. The took position in Grover's Field and maintained a lively fire on the Union skirmishers. These were happily despoiling the supplies. It would be the sole success for the North. 


One Union column went around the side of Grover's Field ignoring the Confederates and went straight for the second supply depot in the new Baptist church at Swain Junction. This was the point at which the game turned and momentum firmly shifted to the Rebels. Despite being in contact with the supply depot the Union 5th command did not receive another card activation in the game. They were left standing in the open as volley after volley poured upon them from the (till now) delayed large command on the Confederates. 


Above shows that final large command marching past Tanner's Schoolhouse. The commanders, Nick and Ian, decided they would not form up but rushed their units individually into a firing position as fast as possible and began a lively fire. This - over 5-6 turns - took an increasingly heavy toll as stress/fatigue/shock tokens mounted. 


The Union - before it all fell apart - about to seize more supplies. 


And the game was essentially over. The Union had lost one command and still had two relatively untouched forces but their morale had been reduced to just two while the Rebels remained on their starting eleven. The game would be decided by a final roll as the Union had despoiled two supply depots. If their commander (me) could roll under (or equal to?) this number at the end of the game a strategic victory would be achieved. 

I didn't. 

All players enjoyed the rules and had no troubles with the card system of activation. The game swung about but all players felt they still had a chance at victory. The Union put all their cards into quickly taking objectives to secure victory and did not take up firing positions to attack the enemy. This may well have been a key factor but in the final 5-6 turns the Union commanders were starved of cards to take any action. The largest command were repeatedly held up in tangled woodland leading to repeated very low movement rolls. 

The Confederate commanders were able to struggle into key positions to fend off attempts at the objective. Both of these commanders felt justice had been done and history repeated itself well as the game proved the superior morale and fighting spirit of southern gents. 

The Union commanders will return for another bite at the Virginia. There are always more men, uniforms, muskets and boots for marching in the industrial powerhouse of the North. 

Saturday, 30 June 2018

Mustafa Rides Again


This week saw a return to Maurice, which is probably the most consistently played set of rules in our increasingly varied wargaming club. We played a doubles game with each side choosing 60 pts ... or was it 80? I can't remember (work has been enormous lately as have the scotch's consumed before this post.) One side was a Russian and French alliance whilst the other was Prussian. 


We fudged the rules of scenario or mission and deployment which allowed one side to completely out deploy the other through gaining a look at where their opponent was going. This dictated the game as for much of the game the out-deployed side strove to move its forces to respond to the direct assault of the side that deployed second. The French and  Russians were able to combine an assault on the Prussian left. As seen in the top picture the Prussian right was caught completely out of position. 


Above the Prussian right, it was a struggle to involve them in the battle. Maurice is always about he short term versus the long term game. New players will push only a segment of their army up and spend all available cards to win a section of the battle. More experienced players will learn when to spend cards on bringing up other sections for a more combined assault. These players will generally win as they did on this occasion. 


The Prussian right threw forward their cavalry to force a reaction on this side which stopped further commands for their forward attack on the other side. The French had flung their cavalry so far forward they floundered with a single card left for many turns. 


Above shows the snuffing out of the Russian infantry. Four brigades marched into the centre and none returned. Monsters by Infantry from both left and right of the Prussian army and also cavalry from the right their units crumbled. This is another example of an initial advantage of multiple cards being played to support a localised attack leading to a long term loss. 


The Prussian reserve columns are thrown in. Conscripts match Russian guards with several National advantages. Another misconception as more units that move well will generally beat elite units. 


The Prussian left, initially out generalled, moves to built a solid defence against the French cavalry assault. Flanking attacks were not possible and the French were forced to charge an aligned frontage on troops and rely on dice rather than any other advantage. 


The French reserve were forced forward against the Prussian right cavalry threat. This soaked up cards and phased that could have been better used elsewhere. The result was indecisive for both sides. 


Above shows nearish the end. The Russian infantry attack in the centre was unsupported and completely destroyed. The French flanking attempt was fast initially then froze to allow a Prussian preparedness that meant cavalry attacked well prepared forces frontally and did not sweep the enemy away. Therefore the victory went to Prussia as their opponents - despite out-deploying their enemy - launched two strong single attacks that were not combined and allowed a counter attack. Too many national advantages fundamentally weakened the Russians especially in regard to the morale score while the French spread their forces too thinly and relied on favourable dice. 

As always with Maurice, husbandry of the number of cards so that each force might be able to launch a sustained and combined attack is key. It takes a while to realise that good cards come and go (as do sixes and ones rolled) but a good plan that is well timed and organised, will usually win. 

This makes Maurice a prince among other wargaming systems. Maurice by Mustafa is undoubtedly out favourite club system. 

Sunday, 10 June 2018

Lasalle game during Mustafa Night

Last evening was "Mustafa Night" in the garage for wargames. On one table Maurice was played and the other was Lasalle.