Showing posts with label ACW. Show all posts

Tuesday, 5 August 2025

Altar of Freedom ACW Stones River


It was our second game of 'Altar of Freedom.' I decided I would dip into my Fire and Fury scenario book and pulled out Stones River. I looked specifically at the Union right wing, where the large Reb attack happened. After one game, I made the call to limit brigades to around 12 a side. For a week night gaming group - and even thought the rules are supposed to be 'fast play' - I really don't see how you could finish a game. 

Above shows the Union left wing stretching down to the far wing. The Rebs had 2 or 3 more brigades than the Union. The amount of cannon was about the same. The Union line was stretched along the edge of a wooded area giving them some cover. Mostly, the Rebs had to cross an open area of ground to get to grips. 


In turn one, the Rebs alone activated. One the far end of the line, this really gave the Rebs a chance to wrap around. This can be seen below best. 


Above, the Rebs pressed on. At first, I (Union) spent my points on activations over the clock or end of phase. The Union were down 4 command points as the Confederates had an extra divisional commander. I would soon change this and try to grab control of the clock. This didn't quite work as the clock is dependent upon the die rolled. This can be used to reduce the clock and, hopefully, catch out divisions that have not been activated.


Back to battle, not rules, the end of the Union line is exposed. This can be well seen below as one Confederate brigade had bypassed this Union unit. I don't know why Ian chose to do this. I was grateful he didn't turn my flank with an enfilade charge - which is deadly in the rules. 

The red and orange dots represent fatigues. 


As can be seen, fatigues are building on the Union brigades at the end of the line. Unfortunately for the Rebs, these build slowly. Musketry drives units back rather than building fatigues. Cannister fire and melee cause fatigues - but usually one at a time. 

The slow process may have been caused by deciding to give all brigades the same unit strength. It was only our second game and, to be honest, it had take me an hour to set up the battlefield and position the troops. As we play on a weekend, thats an hour I have to find between work, getting home and getting dinner ready ...etc. Printing labels as well .... nope. 


The Union were lightly wounded ... but were giving way sluggishly. The above image shows the dire position of the Union far right. It had folded back at right angles and a Confederate brigade was moving past its flank. This unit should have flank charged and rolled up the line. Its commander should be cashiered immediately! 


The Confederates charge across the open field toward the Union line. The fence marks the edge of the wood area. The Union troops before the camera are in the open. Here, at first, the Rebs went well ... then the Union cannon found their range. 


Dots show rising fatigues in the Union line as superior numbers of Rebs crash forward. These are coming in almost in attack columns not quite able to make their number advantage count. 


Losses mount in the Union lines but turns have wasted away. The Rebs have also lost many fatigues but this is not as clear as their little white fatigue dice are not as clear. 

Above, the union cannon were driven back from the line by some counter battery fire. This wasn't done well and I need to read the rules as some of the cannon - on both sides - would probably have been lost. 

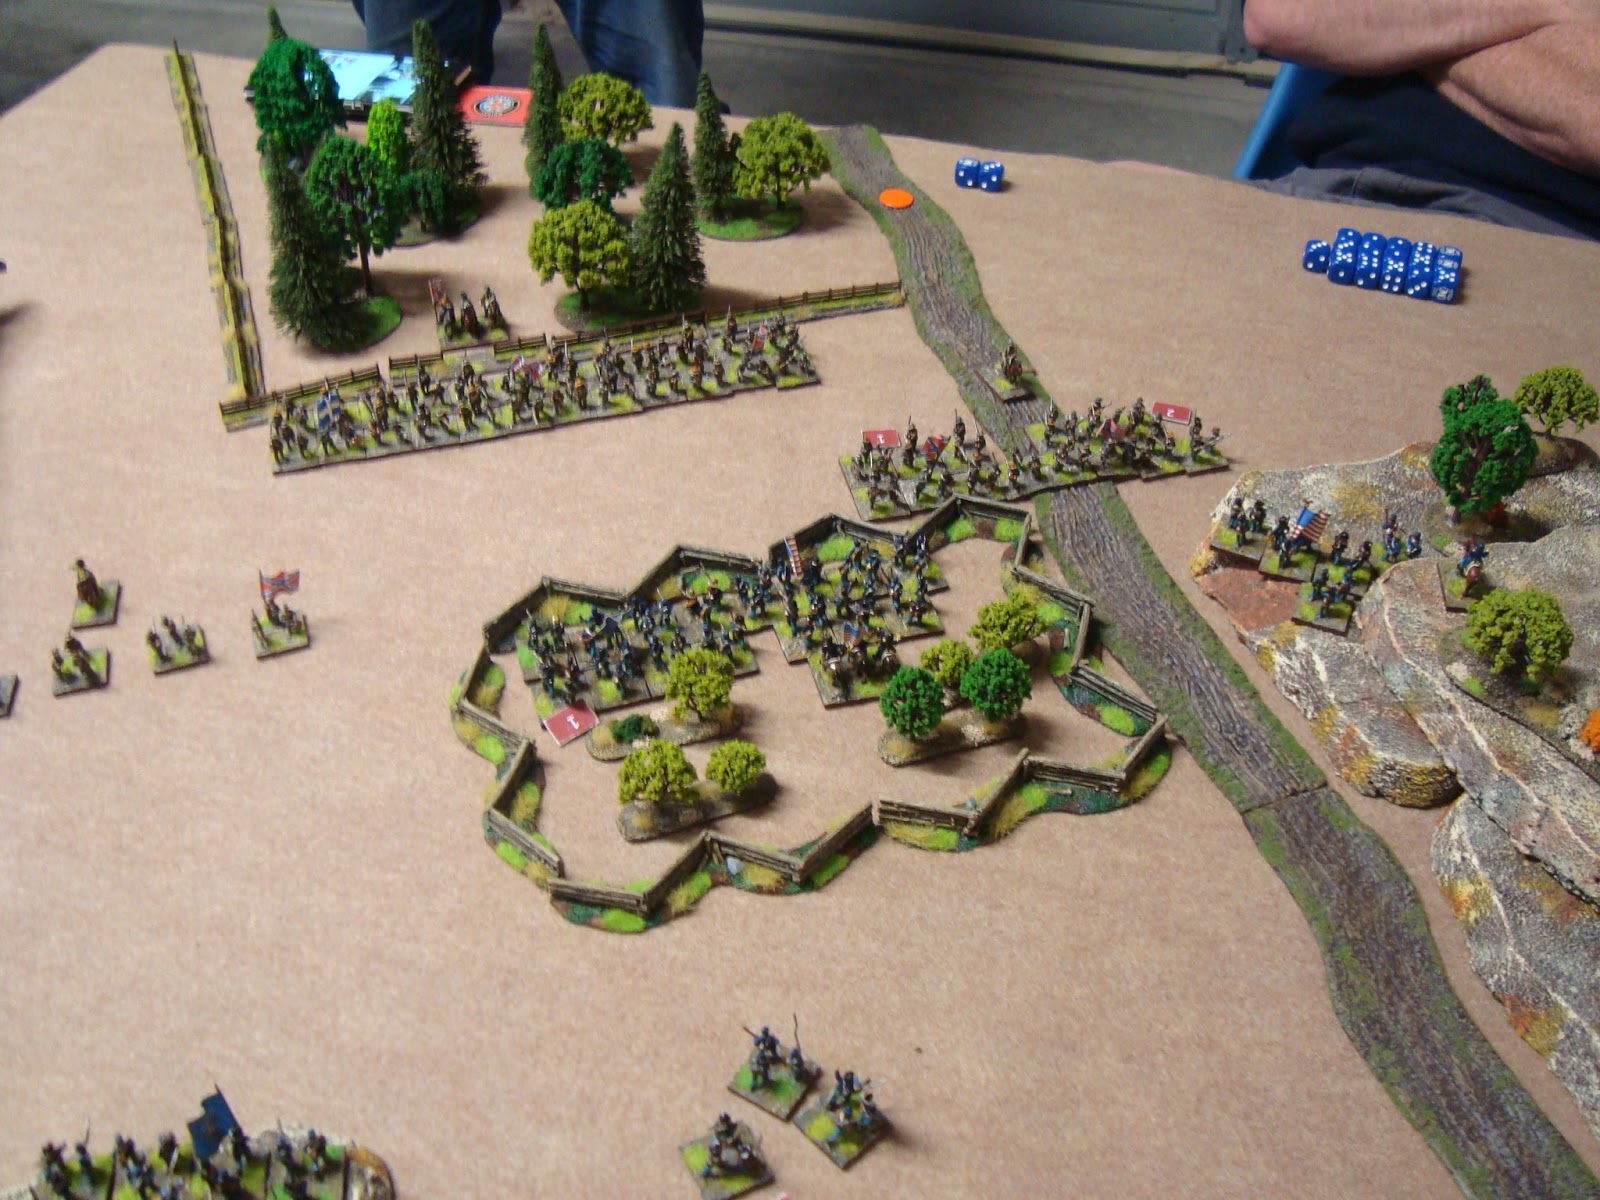
Right at the bottom of the top image, a union cannon has turned to face the Reb attack. A burst of cannister completely dispersed a Confederate brigade. The Union were ahead!


While the initial push was severe, the Union re-organised their line on their far right. At the top of the above image, a whole Confederate division is sent on a long march to try and flank the Union line. This would not quite arrive in time. 


The Union stood firm against the outflanking Reb division. There was not quite enough time. This can be seen as the Rebs have not managed to shake out into a more threatening linear formation - again, attacking in a column. 


At the opposite end of the line the Union had completely driven back the Confederate attack. The two batteries were interrupting their advance and pushing them back again and again. 

We called the game with about a turn to go. There was a lot of pack up too. I really don't understand how the large 20-odd unit per side scenario 'Altar of Freedom' games would play out. You'd need a whole day. Thats okay but not for us. 

The rules work well. After the game, I found we did a couple of things wrong. Picking our targets - not firing at the closest threat - and the rules for recoiling cannons after fire were not done well. Its much easier to defend than attack in this game. But, the Confederates did go straight in and not try to use their advantage by working around the flanks first - that was an after thought. 

The command system is certainly a feature of this game. It works well and has both players scratching their heads. Tactics on points allocation change throughout the game to take advantage of situations that arise and as players try to push an attack or defence in a certain area. We need to introduce leader characteristsics and unit strengths to get a better game. But there is a lot of set up with labels to be done. I really enjoy the game but set up time - which includes the large amount of terrain an ACW game demands - is quite difficult for a week night. The game definitely needs two motivated players to get things up and working (and on Little Wars TV - they even have a dedicated GM as well. No wonder things look better online.) 


Altar of Freedom ACW


This will be short as I've been slack. I posted the images then didn't write the report. 

Okay, after several months, Ian and I finally played 'Altar of Freedom' by the guys from Little Wars TV. I used my - now quite old - ACW 15mm figures. These are based on inch square bases with three to a base. I now think four would look better. 


We played with around 9 brigades a side - which means 3 divisions each. All had a battery too. We did not attempt a historical scenario as we were just trialing the rules. 

And what of the rules ... pretty damn good. The main phase of each turn (the most crucial) comes first with the allocation of CinC and divisional commander points. This decides order of division activation, who controls the clock and a few points should be saved for the final phase of the turn - for a bonus move per division. This can take a little while to get your head around. 


In general, controlling the clock is good if you are losing or defending. Otherwise, spend your points are ensuring the divisions where you have an advantage go first. 

On the night, we lined up our forces and moved in. The Union held back their right and pressed an extra brigade into the centre. This gave them an edge. 


The Confederates were cautious on their right but pushed up on their left. Firing can be quite inconclusive - especially musketry - but may push a unit out of the line or stop an attack. This second one is especially the case with batteries who can interrupt enemy movement and drive back an attacking brigade. 


The Union were able to concentrate more brigades - slightly - in the centre leading to an advantage. 


By the end of the night, no units had broken or routed but the Rebs had more fatigues. We figures out the rules but still had a bit to learn. Cannons caused us a bit of debate on this night. (I don't think batteries should be manhandled into melee for example.)


Thursday, 23 August 2018

Order and Chaos

This week's offering to the gaming gods consisted of a side of Star Wars with a libation of Sharpe's Practice ACW.

Both games were enjoyable and fun was had by all ... but what happened?

Ian (Confederate) and I (Union) renewed our feud once more. On the other table Nic had supplied everything - including a lovely space gaming mat - and was Admiral Akbar to Jason and Micko's Grand Moff-Tarken (I have no real idea how to spell that.)


Sharpe's work very well for ACW. As in previous posts we use a stand of figures to represent a figure. We consider each unit a regiment and the rules respond kindly. I always supply the Union with an additional command but the Reb's have superior troop quality and therefore higher morale. Given the card based activations, it is very hard to bring a numerical superiority to bear as usually parts of each force seem to receive cards irregularly at best.


The cards do represent the ebb and flow of battle initiative quite well as each side seems to enjoy periods of every game where a run of activations allow a side temporary dominance only to fall into lethargy later. Perhaps their energy is temporarily spent (I do note though that gamers imaginatively like to create explanations to justify any rule aberration or nuance to keep their favoured rule system being played ... Am I doing this here? I'm not sure I'd know even if I was.)

Back to the game ... The Union were aggressive this evening and pushed forward with all commands quickly. The dice decided to limit this advance and replicate some prevarication of less than competent commanders in the Union ranks - trans. I rolled low for movement throughout the night.

The Southerners pushed forward with their skirmishing troops infesting Old Scroggin's Orchard and Turkey's Knob - a central high point on the battlefield.


Before too long, the main brigades of both sides deployed and struggled free of woods and fence lines to take better positions. The Union established a strong line along the snake rail fence which was built beside the main Lushville Lane. 


However, the Union commander - confident in his numerical and moral superiority - ordered his men forward to gasps of amazement from the Rebel General Blackcat. The Union skirmishers threw caution to the wind and charged the Reb's in Old Scroggin's orchard driving them from their position and taking it for themselves. From here successive card activitations fell for the Rebs who poured fire on the Union skirmishers and they played no other role that evening. 


By this time the Union battle main battle line had advanced and was eager to take the orchard and make it into a fortress. If only their flanking forces could advance their position would be safe and the rebels would have to chance risky tactics to dislodge them. 


The Union right failed completely to support the centre. One Union regiment was ordered to charge and drive the Reb skirmishers from the brush on Turkey Knob. Poor movement saw them repeatedly raked by volleys which led to an accumulation of shock. This resulted in removal of combat dice and the Union were sent packing. 


Meanwhile ... space things happened. 


I have no real idea what happened. 

But doesn't it look nice. 


Then the cards displayed a fatal shift of initiative against the Union. 


Once in position they lost their nerve - perhaps disordered by terrain or were the Confederate troops energized by this threat? Volley after of volley crashed out from the Rebel line disordering, injuring and killing the brave northern men. 


Shock and casualties grew but - as often happens in the Sharpe's Practice games - it did not effect the moral of the Union in any way. Sure their combat effectiveness was severely curtailed but it did not bring the South any closer to victory. 

(An afterthought here is what would have happened if the Confederate's had risked a charge? Probably victory - with some "acceptable" losses but they are lead after all - and this would have resulted in multiple morale loss rolls for the Union. This may be how it is supposed to be played?)

For the Reb's their moral had been slowly falling throughout the evening as they lost several combats, leaders and a unit here and there. BUT ... again a quirk of Sharpe's is that if you roll low for morale loss your force will succumb VERY slowly indeed. 

It always reminds me of "The Death of the Thousand Cuts" when I play Sharpe's. The morale system needs a tweak. 


So at the end the Union morale was still high but the South was down to just 4 of a once proud 11. Yes, the Union were just about to lose quite a few - if they didn't retire - but probably not quite that many. One attempt at retreat by the North led to a total of zero movement as low dice, terrain and shock combined against this order. There would definitely be more blood before the soldiers would reach safety. Who knows ... high rolls here could see the Union morale tumble - but they still had 10 of their initial 11. 

Due to the advance of the north, the rebs had the whole table to march before reaching their objective - Syd James' Crossing - and the North still had three strong units and a working battery to pepper the rebs as they came. 

Both sides agreed on an amicable draw as it was late and neither side could move from its strong point without ensured destruction. As the sun went down the cries of the wounded could be heard echoing from Old Scroggin's Orchard but each force knew it had done its derndest and were not ashamed for their efforts, bravery or the cause for which they fought. 

The commanders knew that wargames was the winner once more. 


Wednesday, 25 July 2018

Sharpe's ACW Wargame


I've had an interrupted year of wargaming. Increasing demands from work, a disappointing end to my last wargaming project and wanting to spend time with my daughter have all eroded my desire to wargame and paint. This has never happened before. 

I am trying to soldier on and hope the spark re-ignites. 

This week's game - on the suggestion of my good friend Nick - led me to an enjoyable return to the Lardies' Sharpe Practice II in the ACW. I use my ACW armies originally painted and based for Fire and Fury. I use one base to represent one figure in Sharpe's. This gives the impression of moving regiments around and the rules feel just right for the task. 

The scenario was Sweep the Table and the year was 1863. This Confederates were using the basic list from the Sharpe's book while the Union had their basic list plus an additional command of two units of infantry. The Union were attacking, trying to despoil the supplies of the Rebs. 


After all the early marching favoured the Union, the Rebels sprang to life. They led with their skirmishers and the smaller command of infantry with their larger command of three infantry units trailing behind. The took position in Grover's Field and maintained a lively fire on the Union skirmishers. These were happily despoiling the supplies. It would be the sole success for the North. 


One Union column went around the side of Grover's Field ignoring the Confederates and went straight for the second supply depot in the new Baptist church at Swain Junction. This was the point at which the game turned and momentum firmly shifted to the Rebels. Despite being in contact with the supply depot the Union 5th command did not receive another card activation in the game. They were left standing in the open as volley after volley poured upon them from the (till now) delayed large command on the Confederates. 


Above shows that final large command marching past Tanner's Schoolhouse. The commanders, Nick and Ian, decided they would not form up but rushed their units individually into a firing position as fast as possible and began a lively fire. This - over 5-6 turns - took an increasingly heavy toll as stress/fatigue/shock tokens mounted. 


The Union - before it all fell apart - about to seize more supplies. 


And the game was essentially over. The Union had lost one command and still had two relatively untouched forces but their morale had been reduced to just two while the Rebels remained on their starting eleven. The game would be decided by a final roll as the Union had despoiled two supply depots. If their commander (me) could roll under (or equal to?) this number at the end of the game a strategic victory would be achieved. 

I didn't. 

All players enjoyed the rules and had no troubles with the card system of activation. The game swung about but all players felt they still had a chance at victory. The Union put all their cards into quickly taking objectives to secure victory and did not take up firing positions to attack the enemy. This may well have been a key factor but in the final 5-6 turns the Union commanders were starved of cards to take any action. The largest command were repeatedly held up in tangled woodland leading to repeated very low movement rolls. 

The Confederate commanders were able to struggle into key positions to fend off attempts at the objective. Both of these commanders felt justice had been done and history repeated itself well as the game proved the superior morale and fighting spirit of southern gents. 

The Union commanders will return for another bite at the Virginia. There are always more men, uniforms, muskets and boots for marching in the industrial powerhouse of the North. 

Thursday, 1 September 2016

Sharp Practice II ACW

Sharp's II ACW ... using 15mm Old Glory figures. Originally based for Fire and Fury at 3 to a base. Because I have lots of the little buggers, just use one base to represent one figure in Sharp's. And doesn't Sharp II reproduce the period well.


We played an Encounter battle (i think it is called encounter?) without support choices or minor characters. Used the 1861 basic lists but then added a light cannon (with a level 1 leader) and an additional level 2 leader with 2 groups of 8 with rifled musket to each side. I was just trying to be even rather than producing a necessarily accurate situation.


The Rebs were unlucky and their deployment point landed in an open space while the Union had a wonderful position behind snake rail fences. One of their commands was hampered by a forest as it tried to march out to the right flank. The Union had problems with Movement events all night - once a leader was trampled and on another occasion a leader lost their map.


The Rebs were hampered by a supposedly lightly wooded rocky hill which must have been covered with clinging vines as low movement rolls kept their main battle line out of the fight. This led to a piecemeal attack which the Union easily dealt with through a hail of shot and shell.


The Rebs did fight back but only managed to maul the Union skirmishers and place shock on the main battle line. It was not a fair trade as four Rebs groups were savaged and shock was liberally cast about by the Union fire.


One little sour note was that continuous low rolls for moral meant that the game did not end of its own accord but was called by the players. The poor Rebs stumbled on with little chance of victory but a little or non diminishing army morale.


A great game which we would play again and even feel that we could increase forces further. We usually play multi-player rather than 1 vs 1 so more troops give everyone a command or 3. It 'felt' and 'looked' right for an ACW game for all of use and really ... can any wargamer ask for more than that? (Oh yes, we did have a great time too ... esp when the Rebs shot their main commander in the arse dropping him a command level.)

All up it could have been worse for the Rebs ... the Union main line was hampered by the orchard in the centre of the table which severly reduced the fire of two groups (stopped it completely as all players very very eager to husband their first fire and controlled fire advantages.) Also shock placed on the main Union battle line manning the road reduced its ability to move up. The Reb skirmishers that placed the shock on these groups also needed to be cleared from the small hill and this the Union did not do. The commander (me) should have rallied shock and moved into short range of the skirmishers and given them a drubbing. But I didn't preventing the Union from pouring fire into the flank of the main Reb line as it struggled into position. It's tardiness was a major element in the Union victory.